


To replace the heat sink, do the following:
1. Remove all media from the drives and turn off all attached devices and the computer. Then, disconnect
all power cords from electrical outlets and disconnect all cables that are connected to the computer.
2. Place a soft, clean towel or cloth on the desk or surface. Hold the sides of your computer and gently lay
it down so that the screen is against the surface and the cover is facing up.
3. Remove the computer cover. See “Removing the computer cover” on page 42.
4. Locate the heat sink. See “Locating components” on page 15.
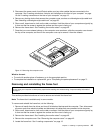
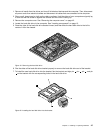
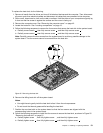
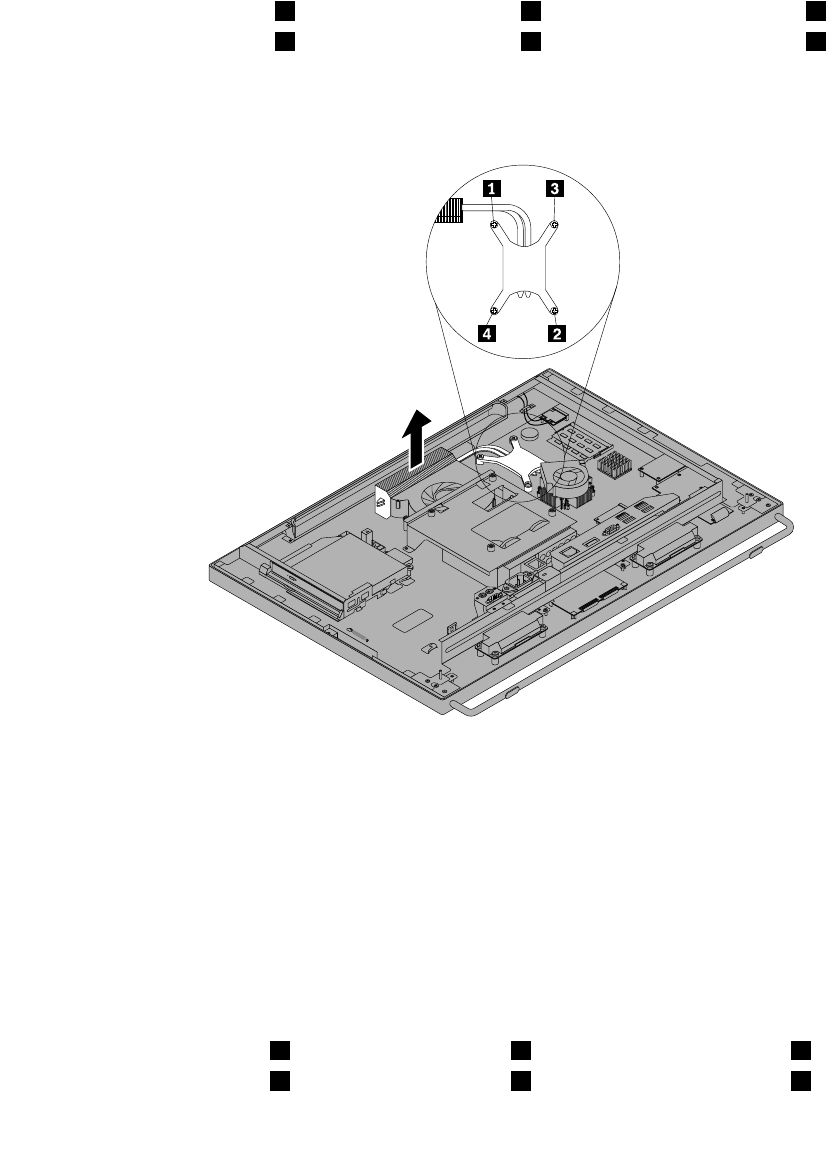
5. Follow the following sequence to remove the four screws that secure the heat sink to the system board:
a. Partially remove screw 1 , then fully remove screw 2 , and then fully remove screw 1 .
b. Partially remove screw 3 , then fully remove screw 4 , and then fully remove screw 3 .
Note: Carefully remove the four screws from the system board to avoid any possible damage to the
system board. The four screws cannot be removed from the heat sink.
Figure25. Removing the heat sink
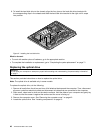
6. Remove the failing heat sink off the system board.
Notes:
• You might have to gently twist the heat sink to free it from the microprocessor.
• Do not touch the thermal grease while handling the heat sink.
7. Position the new heat sink on the system board so that the four screws are aligned with the
corresponding holes in the system board.
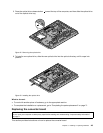
8. Follow the following sequence to install the four screws to secure the heat sink, as shown in Figure 25
“Removing the heat sink” on page 51.
a. Partially tighten screw 1 , then fully tighten screw 2 , and then fully tighten screw 1 .
b. Partially tighten screw 3 , then fully tighten screw 4 , and then fully tighten screw 3 .
Chapter 5. Installing or replacing hardware 51