


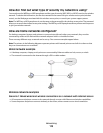
If the printer is currently set up for Ethernet
1
Attach a USB cable to the computer and to the printer.
2 Add the printer (see “Add the printer” on page 113).
3 A second print queue will be created. Remove the Ethernet queue if you do not want to switch back to accessing
the printer over an Ethernet connection.
If the printer is currently set up for wireless
1
Attach a USB cable to the computer and to the printer.
2 Add the printer (see “Add the printer” on page 113).
3 A second print queue will be created. Remove the wireless queue if you do not want to switch back to accessing
the printer over a wireless connection.
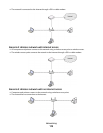
Using the printer over an Ethernet network
Select the connection type that describes how you currently access your printer:
If the printer is currently set up for wireless
1
Plug an Ethernet cable into the printer and to an available port on a switch or wall jack.
2 Wait for a minute for the Ethernet network interface to become active and acquire an IP address from the network.
3 Add the printer (see “Add the printer” on page 113).
4 A second print queue will be created. Remove the wireless queue if you do not want to switch back to accessing
the printer over a wireless network.
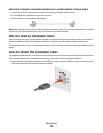
If the printer is currently set up locally (using USB connection)
1
Plug an Ethernet cable into the printer and to an available port on a switch or wall jack.
2 Insert the software and installation CD into the computer you want to use to configure the printer.
3 Follow the instructions on the computer screen for configuring a printer on an Ethernet network.
Note: You will need a USB cable to complete the configuration.
Add the printer
In Mac OS X version 10.5
1
From the Apple menu, choose System Preferences.
2 Click Print & Fax under the Hardware section.
3 Click + .
4 Select the printer from the list and click Add.
Networking
113