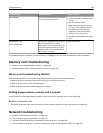
Check the cable connections for the following hardware, if applicable:
Power supply Answering machine Cable modem Splitter
Telephone VoIP adapter DSL filter RJ‑11 adapter
• If the printer is connected to a Digital Subscriber Line, then make sure you are using a DSL filter for the printer.
• If the printer is connected to a VoIP adapter or cable modem, then make sure that the printer is plugged into the
first phone port.
• If you are using a splitter, then make sure that you are using a phone splitter. Do not use a line splitter.
Cannot send faxes
If the “Fax troubleshooting checklist” does not solve the problem, then try one or more of the following:
MAKE SURE TO ENTER YOUR USER INFORMATION IN THE PRINTER
If you did not enter your user information during initial setup, then enter your fax name and fax number. This is the
information that identifies you as the sender in all the faxes that you send. Some countries or regions require the
fax number and fax name for you to send a fax, and some fax machines block anonymous faxes.
REDUCE THE TRANSMISSION SPEED OF THE FAX MODEM
The modem of the printer can send and receive data up to at 33,600 bps. However, it is not necessary to set the
modem to its fastest transmission capability. The speed of the modem of the receiving fax machine must match or
be greater than the speed at which you are sending your fax. Otherwise, your fax will not be received.
1 From the home screen, navigate to:
> Fax Setup > Dialing and Sending > Max Send Speed
2 Select a sending speed, and then touch Accept.
ENABLE ERROR CORRECTION
Errors and blurs may appear in the faxed document if there is too much noise on the line. This feature enables the
printer to transmit the bad blocks of data again and correct the errors. When a fax has too many errors, the fax may
be rejected by the receiving fax machine.
From the home screen, navigate to:
> Fax Setup > Dialing and Sending > Error Correction > On > Accept
ENABLE AUTOMATIC FAX CONVERSION
If the receiving fax machine does not support color fax, then this option automatically converts the outgoing color
fax to black and white. It also automatically reduces the resolution of the fax to a resolution that the receiving machine
can support.
From the home screen, navigate to:
> Fax Setup > Dialing and Sending > Auto Fax Convert > On > Accept
Troubleshooting 159


