17
Installing drivers for network printing
Printing a network setup page
If the printer is attached to a network, print a network setup page to verify the network connection. This
page also provides important information that helps you configure for network printing.
Note: If an optional MarkNet print server is installed, you see Print Net1 Setup on the
display.
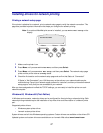
1 Make sure the printer is on.
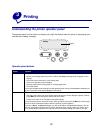
2 Press Menu until you see Utilities Menu, and then press Select.
3 Press Menu until you see Print Net Setup, and then press Select. The network setup page
prints and the printer returns to Ready status.
4 Check the first section on the network setup page and confirm that Status is “Connected.”
If Status is “Not Connected,” your LAN drop may not be active or your network cable may be
malfunctioning. Consult your network support person for a solution, and then print another network
setup page to verify that you are connected to your network.
After you have assigned and verified the TCP/IP settings, you are ready to install the printer on each
network computer.
Windows 95, Windows 98 (First Edition)
In Windows environments, network printers can be configured for direct printing or shared printing. Both
network printing methods require the installation of a printer driver and the creation of a network printer
port.
Supported printer drivers
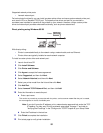
• Windows system printer driver
• Lexmark custom printer driver
System drivers are built into Windows operating systems. Custom drivers are available on the drivers CD.
Updated system and custom drivers are available on our Lexmark Web site at www.lexmark.com.
1
Menu
2
Select
3
Return
4
Go
5
Stop
6
Utilities Menu


