


25
Setting Up: Advanced
Linksys E-Series
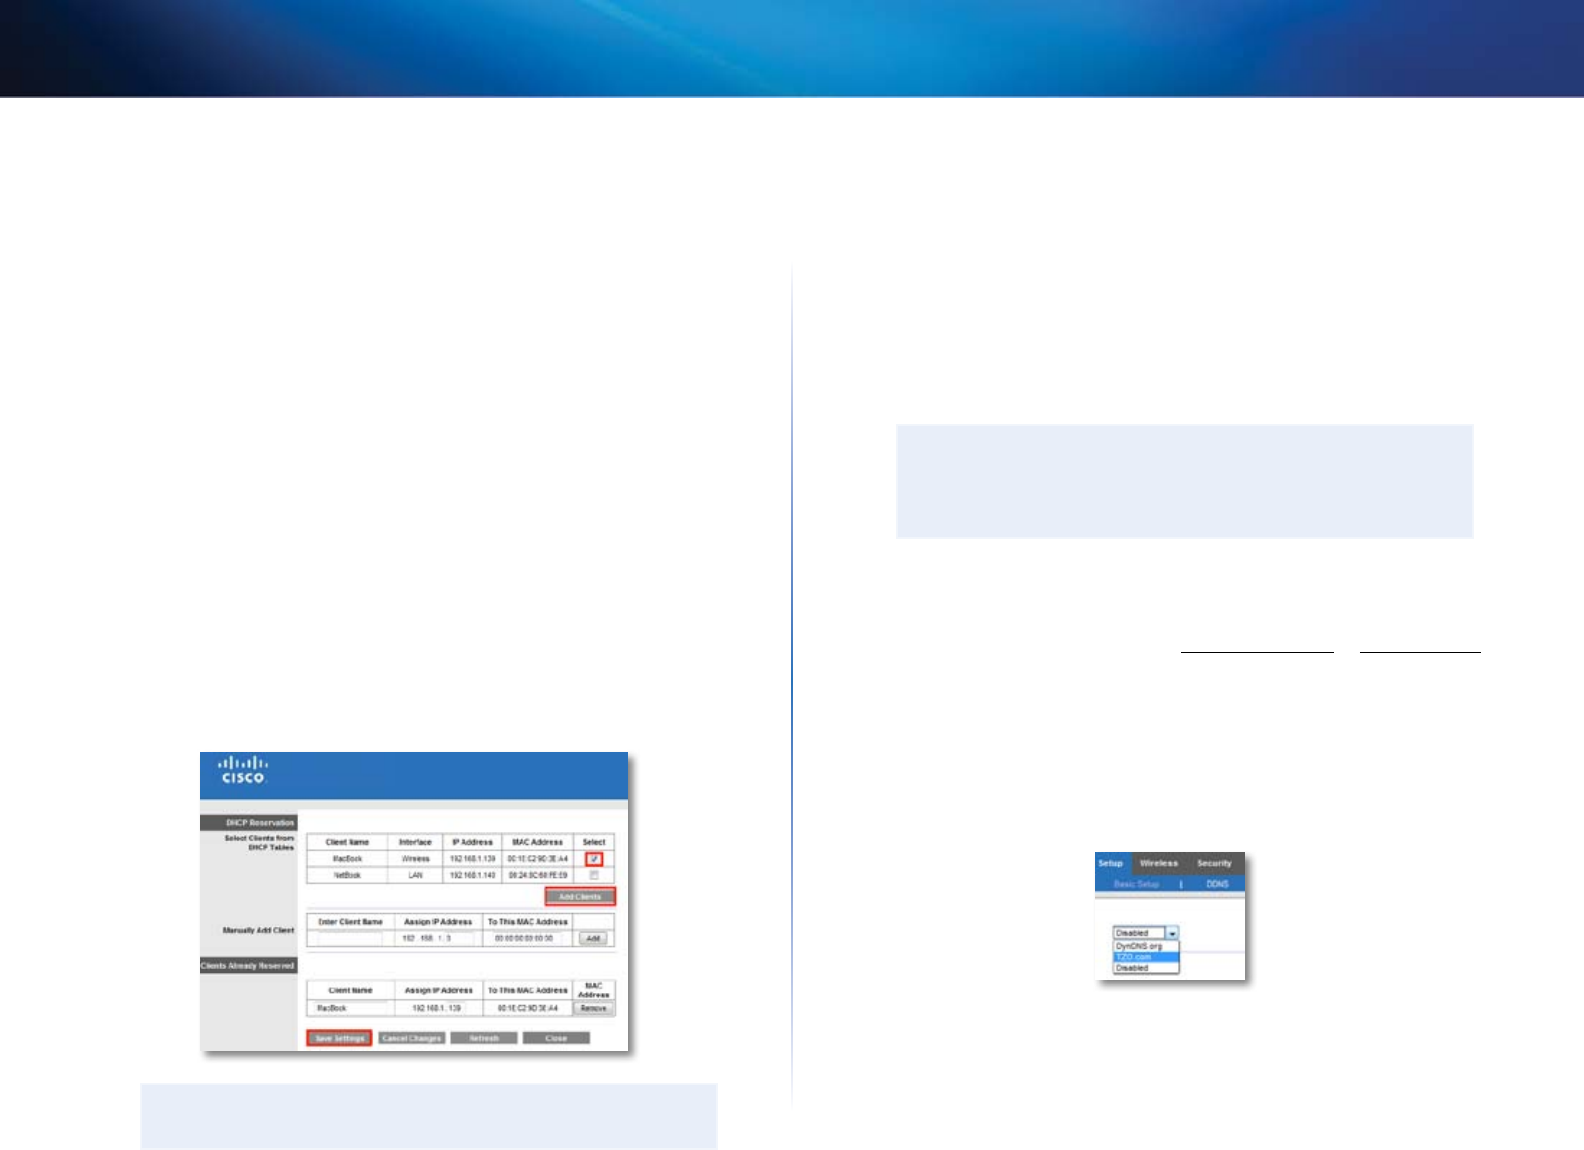
How to set up DHCP reservation
Why would I use it? DHCP reservation allows you to assign a unique, fixed IP
address to a specific device on your network. Assigning a fixed IP address is
a good way to manage devices such as print servers, web cameras, network
printers, and game consoles. A fixed IP address is also recommended if you
want to use port forwarding for devices that need to receive inbound traffic
from the Internet (“How to set up port forwarding” on page 50).
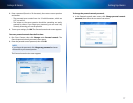
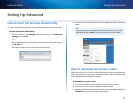
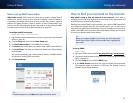
To configure DHCP reservation:
Setup > Basic Setup > DHCP Reservation
1.
Log into the browser-based utility (see “How to open the browser-based
utility” on page 21).
2.
Click the Setup tab, then click the Basic Setup page.
3.
Click DHCP Reservation (in the middle of the screen).
4.
Click Select next to the client you want to create a DHCP reservation for.
5.
Click Add Clients. The client you selected is added to the Clients Already
Reserved table.
You can also manually enter a client name, IP address, and MAC address
of a device to create a DHCP reservation.
6.
Click Save Settings.
TIP
For field descriptions, click Help on the right side of the screen.
How to find your network on the Internet
Why would I need to find my network on the Internet? If you want to
remotely access a USB drive attached to your router or view a web camera, you
need to find your network on the Internet.
Working with several DDNS service providers, your router’s DDNS feature lets
you configure a domain name for your network, which you can then use to
easily find your network on the Internet. If your ISP changes your network’s IP
address, the DDNS service providers detect the address change and continue
to route your domain name to that address.
TIP
Before you configure DDNS on your router, you must sign up for
DDNS service from a DDNS service provider that’s supported by
your router.
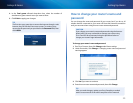
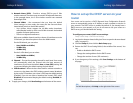
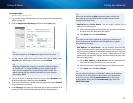
To set up DDNS:
Setup > DDNS
1.
Sign up for DDNS service at either www.dyndns.org or www.tzo.com.
2.
Log into the browser-based utility (see “How to open the browser-based
utility” on page 21).
3.
Click the Setup tab, then click the DDNS page.
4.
In the DDNS Service drop-down list, click your DDNS service provider.
The examples below are based on TZO.com. The settings used by
DynDNS.org are slightly different.