37
Adjusting the Position, Size, Fine Picture, Picture Adj
The position of the image can be adjusted and flickering
of the image can be corrected.
Example: Adjusting the vertical position in the normal
mode
Press the 3-D1(ON) button on the remote controller to
display the MAIN MENU on the screen, then...
1. Use the ▲ and ▼ buttons to select “SCREEN”, then
press the 3-D1(ON) button.
The “SCREEN” menu appears.
3. To adjust the vertical position ...
Use the ▲ and ▼ buttons to select “V-POSITION”.
SCREEN
MODE
V–POSITION
H–POSITION
V–HEIGHT
H–WIDTH
AUTO PICTURE
NORMAL:
ON:
SEL. ADJ. RETURN
EXIT
* The mode can also be switched by pressing the
“WIDE” button on the remote controller.
* If neither the ᮤ or ᮣ button is pressed within 5 sec-
onds, the current adjustment is set and the previous
screen reappears.
To continue making other computer image adjustments
...
Repeat from step 3.
5. Press the 3-D1(ON) button.
The vertical position of the computer's image has now
been adjusted.
4. Adjust using the ᮤ and ᮣ buttons.
SCREEN
MODE
V–POSITION
H–POSITION
V–HEIGHT
H–WIDTH
AUTO PICTURE
FULL:
ON:
SEL. ADJ. RETURN
EXIT
2. To adjust the normal mode ...
Use the ᮤ and ᮣ buttons to select “NORMAL”.
The mode switches as follows when the ᮤ and ᮣ but-
tons are pressed:
→ NORMAL ↔ FULL ←
V–POSITION
SCREEN
MODE
V–POSITION
H–POSITION
V–HEIGHT
H–WIDTH
AUTO PICTURE
NORMAL:
SEL. ADJ. RETURN
EXIT
ON:
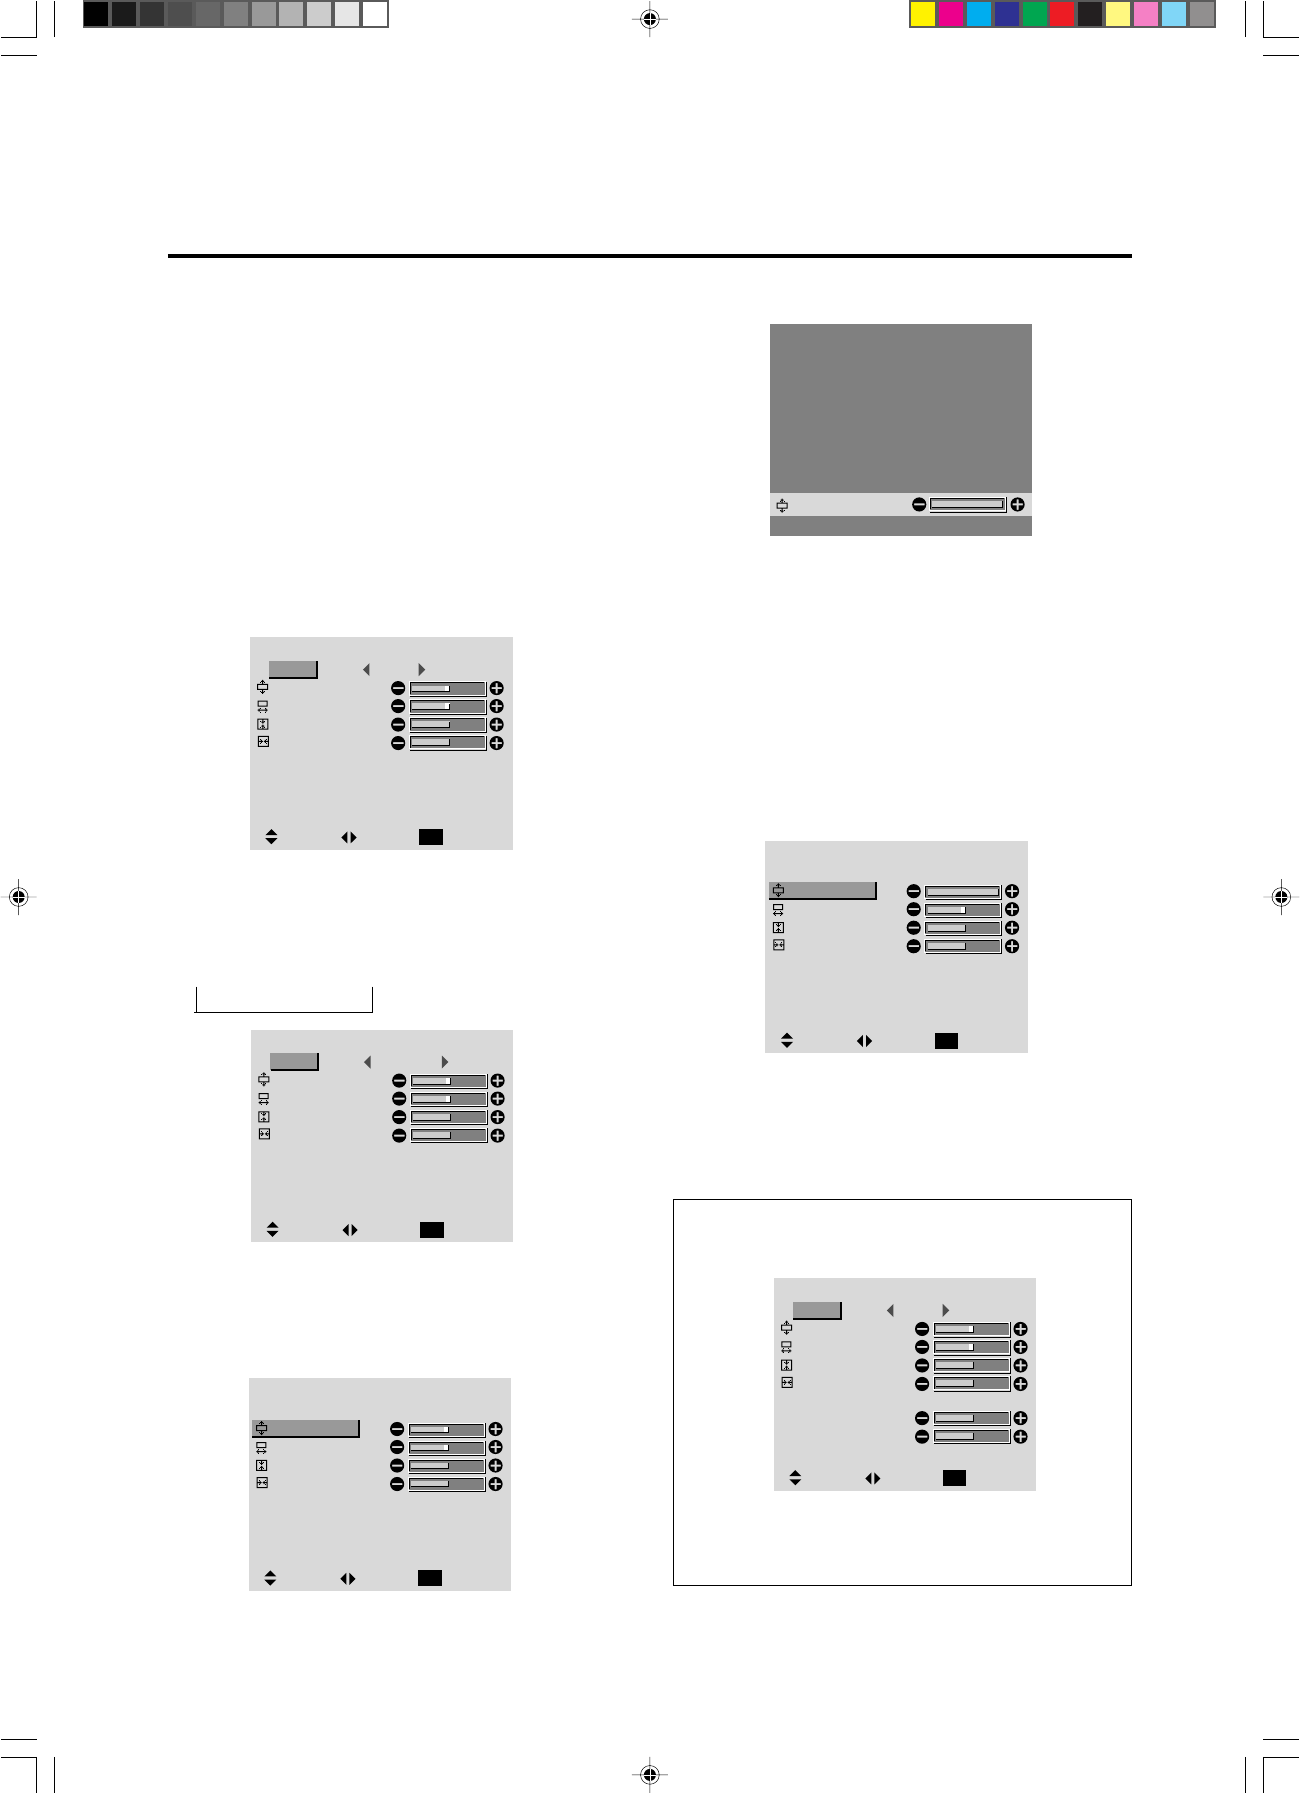
Information
Ⅵ When “AUTO PICTURE” is “OFF”
Screen Settings Menu
6. Once all adjustments are completed ...
Press the “OK” button to return to the main menu.
To delete the main menu, press the “OK” button once
more.
When Auto Picture is off, the Fine Picture and the
Picture ADJ items are displayed so that you can adjust
them.
SCREEN
MODE
V–POSITION
H–POSITION
V–HEIGHT
H–WIDTH
AUTO PICTURE
NORMAL:
SEL. ADJ. RETURN
EXIT
ON:
SCREEN
MODE
V–POSITION
H–POSITION
V–HEIGHT
H–WIDTH
AUTO PICTURE
FINE PICTURE
PICTURE ADJ.
FULL:
OFF:
SEL. ADJ. RETURN
EXIT
PD4292D-2 00.10.4, 3:11 PM37


