


9-5
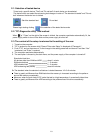
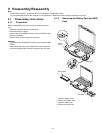
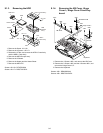
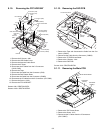
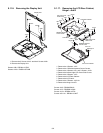
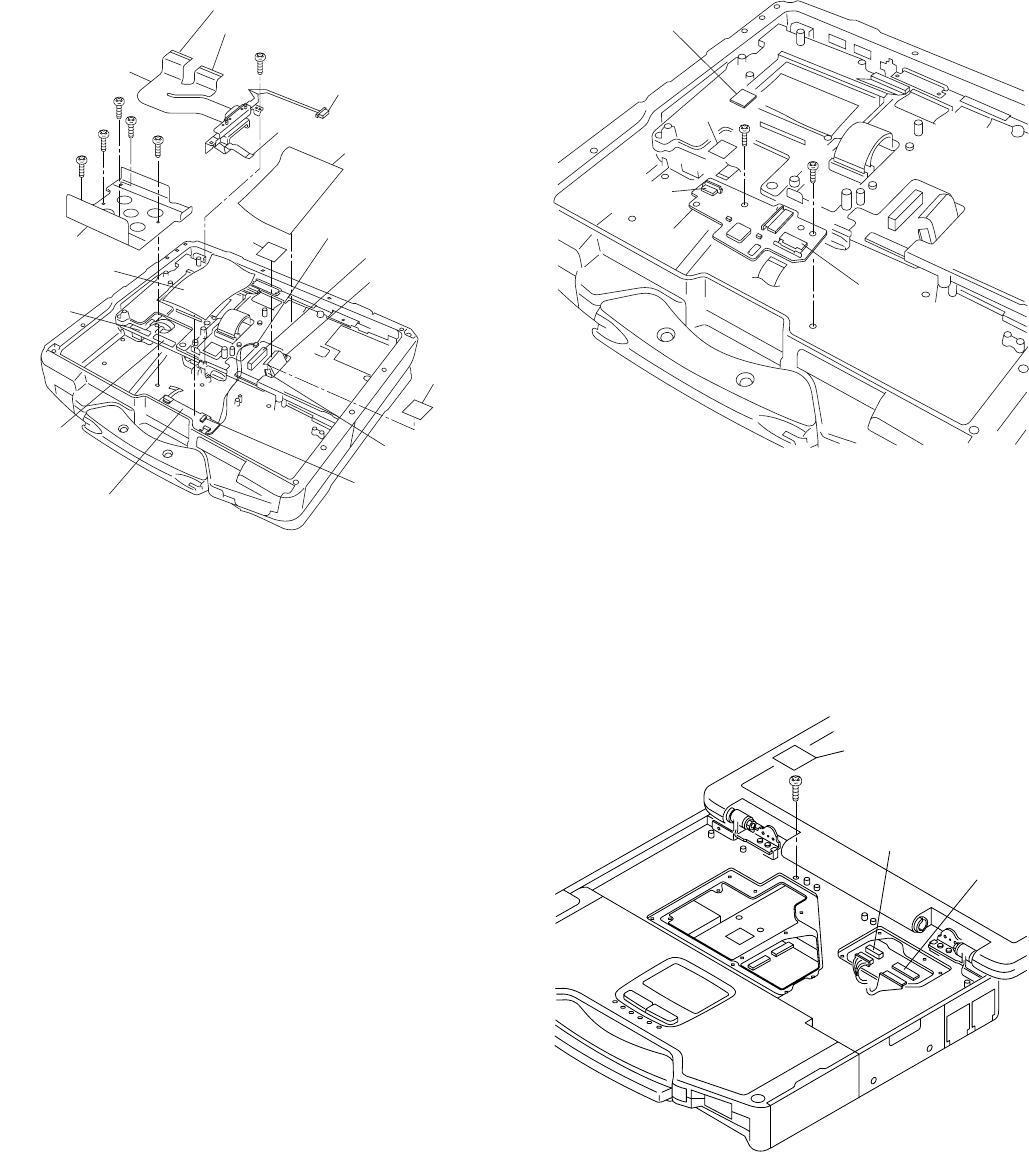
9.1.9. Removing the FPC HDD BAT
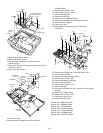
1. Remove the 5 Screws. <N4>
2. Remove the HDD Cable Cover.
3. Remove the Antenna Cable Sheet.
4. Remove the 2 Tapes.
5. Disconnect the 2 Cables from the 2 Connectors.
(CN10,CN26)
6. Remove the Tape.
7. Disconnect the Cable from the Connector. (CN9)
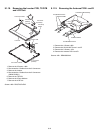
8. Remove the Pad Protect Sheet.
9. Disconnect the Cable from the Connector. (CN800)
10. Disconnect the 2 Cables from the 2 Connectors. (CN7,CN8)
11. Remove the Screw. <N16>
12. Remove the FPC HDD BATT.
Screws <N4>: DRQT26+D3FKL
Screws <N16>: DRQT26+E5FKL
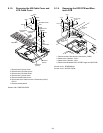
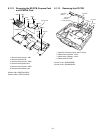
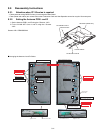
9.1.10. Removing the PAD PCB
1. Remove the Tape and disconnect the Cable from the Con-
nector. (CN801)
2. Disconnect the Cable from the Connector. (CN802)
3. Remove the TP PCB Screw Sheet.
4. Remove the 2 Screws. <N4>
5. Remove the PAD PCB.
Screws <N4>: DRQT26+D3FKL
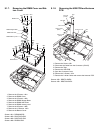
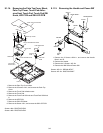
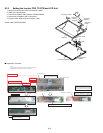
9.1.11. Removing the Main PCB
1. Remove the TOP Screw Sheet.
2. Remove the Screw. <N7>
3. Disconnect the 2 Cables from the 2 Connectors.
(CN17,CN27)
<N4>
<N16>
<N4>
<N4>
<N4>
<N4>
Connector(CN10)
Connector(CN26)
HDD Cable Cover
FPC HDD BAT
Antenna Cable Sheet
to Connector (CN800)
Connector (CN800)
to Connector (CN26)
Tape
Connector(CN9)
Pad PCB
Tape
to Connector (CN8)
to Connector (CN7)
Connector
(CN8)
Pad Protect
Sheet
Connector
(CN7)
to Connector (CN9)
<N4>
<N4>
Pad PCB
Connector
(CN802)
Connector
(CN801)
Tape
TP PCB Screw Sheet
<N7>
TOP Screw Sheet
Connector
(CN17)
Connector
(CN27)