


Configuring the Switch
3-40
3
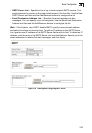
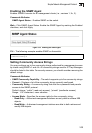
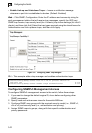
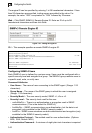
Web – Click SNMP, Configuration. Add new community strings as required, select
the access rights from the Access Mode drop-down list, then click Add.
Figure 3-26 Configuring SNMP Community Strings
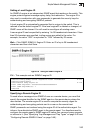
CLI – The following example adds the string “spiderman” with read/write access.
Specifying Trap Managers and Trap Types
Traps indicating status changes are issued by the switch to specified trap managers.
You must specify trap managers so that key events are reported by this switch to
your management station (using network management platforms such as HP
OpenView). You can specify up to five management stations that will receive
authentication failure messages and other trap messages from the switch.
Command Usage
• If you specify an SNMP Version 3 host, then the “Trap Manager Community String”
is interpreted as an SNMP user name. If you use V3 authentication or encryption
options (authNoPriv or authPriv), the user name must first be defined in the
SNMPv3 Users page (page 3-44). Otherwise, the authentication password and/or
privacy password will not exist, and the switch will not authorize SNMP access for
the host. However, if you specify a V3 host with the no authentication (noAuth)
option, an SNMP user account will be automatically generated, and the switch will
authorize SNMP access for the host.
• Notifications are issued by the switch as trap messages by default. The recipient
of a trap message does not send a response to the switch. Traps are therefore not
as reliable as inform messages, which include a request for acknowledgement of
receipt. Informs can be used to ensure that critical information is received by the
host. However, note that informs consume more system resources because they
must be kept in memory until a response is received. Informs also add to network
traffic. You should consider these effects when deciding whether to issue
notifications as traps or informs.
Console(config)#snmp-server community spiderman rw 4-109
Console(config)#