


Chapter – Networking Basics
Multi-Tech Systems, Inc. Wireless Network Adapter User Guide 34
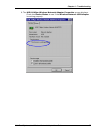
Setting Sharing Levels of Access
After the sharing utility is set up, you can set the access level to your files that others
will have. Access can be set for a particular file(s) or disk drive(s) as well as all files
and drives.
Types of Access
Full Allows others on your network the to open, read, write,
save, copy, move, and delete files on the disk or in the
folder.
Read-Only Allows others on your network to lonely open and read
the files on the disk or in the folder.
Depends on
Password
Allows others on your network access to your files and
drives conditional upon inputting a password.
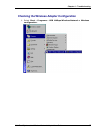
The process for setting levels of access to files and drives are the same.
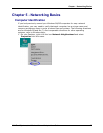
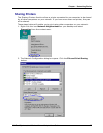
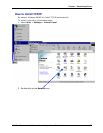
1. Using the Windows Explorer or the icon My Computer on your desktop,
navigate to the disk drive or folder you want to share.
2. Right-click on the disk drive or folder icon and select Sharing.
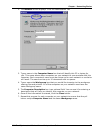
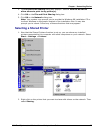
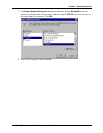
3. Select Share As to set the parameters for sharing this particular disk drive or
folder.
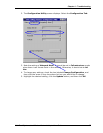
4. In the Share Name box, enter any name that helps you to identify the disk drive
or folder you are sharing. Note that entering the name of the location or file may
help especially as more resources on your network are shared.
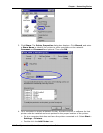
5. The Comment box is optional. You could use this field to list the type of access or
names of those who have access.
6. Access Type sets the level of access allowed (full, read-only, or depend on
password)
7. The Passwords field allows you to apply a level of security to your shared drives
and folders. Other users on your network will be required to enter the password
you designate here before they can access the drive or folder. You can set two
levels of security by adding a second level password. Leaving the Password boxes
empty gives everyone on the network access to the drive or folder.
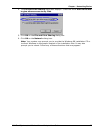
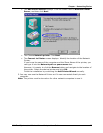
8. Click OK to continue. You will be prompted to enter the password(s) you provided
for verification. Retype the password(s) just as you entered them the first time.
9. The drive or folder can now be accessed from another computer on your network.
To do this, the users will:
• Double-click the desktop or Windows Explorer icon My Computer.
• Navigate to the computer with the shared drive or folder (use the Computer
Name to identify it - see the Computer Identification section above), and
double-click. The shared drives or folders display. Double-click on one. If a
password is required, the user will be prompted for the password.
To make this process easier, Windows allows you to map shared drives and folders to
a drive letter on another computer. For example:
On the computer where you will be accessing a shared folder from another
computer, go to the icon My Computer and right-click. Select Map Network
Drive where you will then be able to assign an available drive letter. If you check
Reconnect at logon, Windows will make this network drive available each time
you start your computer.