IP Setup and Network Address Translation 9-17
Note: You need not use this screen if you have only a single Ethernet IP subnet. In that case, you can continue
to enter or edit the IP address and subnet mask for the single subnet on the IP Setup screen.
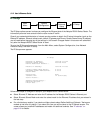
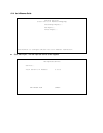
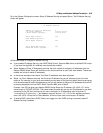
This screen displays up to eight rows of two editable columns, preceded by a row number between one and
eight. If you have eight subnets configured, there will be eight rows on this screen. Otherwise, there will be one
more row than the number of configured subnets. The last row will have the value 0.0.0.0 in both the IP
address and subnet mask fields to indicate that you can edit the values in this row to configure an additional
subnet. All eight row labels are always visible, regardless of the number of subnets configured.
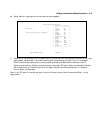
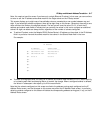
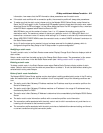
■ To add an IP subnet, enter the Netopia R5000 Series Router’s IP address on the subnet in the IP Address
field in a particular row and the subnet mask for the subnet in the Subnet Mask field in that row.
For example:
■ To delete a configured subnet, set both the IP address and subnet mask values to 0.0.0.0, either explicitly
or by clearing each field and pressing Return to commit the change. When a configured subnet is deleted,
the values in subsequent rows adjust up to fill the vacant fields.
Note that the subnets configured on this screen are tied to the address serving pools configured on the IP
Address Pools screen, and that changes on this screen may affect the IP Address Pools screen. In particular,
deleting a subnet configured on this screen will delete the corresponding address serving pool, if any, on the IP
Address Pools screen.
IP Subnets
IP Address Subnet Mask
---------------- ---------------
#1: 192.128.117.162 255.255.255.0
#2: 192.128.152.162 255.255.0.0
#3: 0.0.0.0 0.0.0.0
#4:
#5:
#6:
#7:
#8:


