13-2 User’s Reference Guide
Caution!
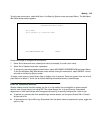
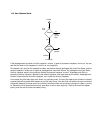
You are strongly encouraged to add protection to the configuration screens. Unprotected screens could allow an
unauthorized user to compromise the operation of your entire network.
Once user accounts are created, users who attempt to access protected screens will be challenged. Users who
enter an incorrect name or password are returned to a screen requesting a name/password combination to
access the Main Menu.
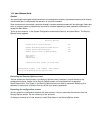
To set up user accounts, in the System Configuration screen select Security and press Return. The Security
Options screen appears.
PP
PP
rr
rr
oo
oo
tt
tt
ee
ee
cc
cc
tt
tt
ii
ii
nn
nn
gg
gg
tt
tt
hh
hh
ee
ee
SS
SS
ee
ee
cc
cc
uu
uu
rr
rr
ii
ii
tt
tt
yy
yy
OO
OO
pp
pp
tt
tt
ii
ii
oo
oo
nn
nn
ss
ss
ss
ss
cc
cc
rr
rr
ee
ee
ee
ee
nn
nn
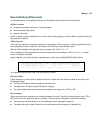
The first screen you should protect is the Security Options screen, because it controls access to the
configuration screens. Access to the Security Options screen can be protected with a password.
Select Password for This Screen in the Security Options screen and enter a password. Make sure this
password is secure and is different from any of the user account passwords.
PP
PP
rr
rr
oo
oo
tt
tt
ee
ee
cc
cc
tt
tt
ii
ii
nn
nn
gg
gg
tt
tt
hh
hh
ee
ee
cc
cc
oo
oo
nn
nn
ff
ff
ii
ii
gg
gg
uu
uu
rr
rr
aa
aa
tt
tt
ii
ii
oo
oo
nn
nn
ss
ss
cc
cc
rr
rr
ee
ee
ee
ee
nn
nn
ss
ss
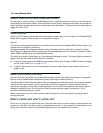
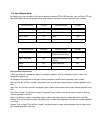
You can protect the configuration screens with user accounts. You can administer the accounts from the
Security Options screen. You can create up to four accounts.
To display a view-only list of user accounts, select Show Users in the Security Options screen.
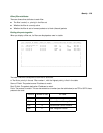
Security Options
Enable Dial-in Console Access: Yes
Enable SmartStart/SmartView/Web Server: Yes
Enable Telnet Console Access: Yes
Enable Telnet Access to SNMP Screens: Yes
Show Users...
Add User...
Delete User...
Password for This Screen (11 chars max):
Return/Enter accepts * Tab toggles * ESC cancels.
Set up configuration access options here.


