Setting up your Router with the SmartStart Wizard 5-5
When the test is successful, SmartStart presents you with the “Additional Configuration screen,” shown below.
AA
AA
dd
dd
vv
vv
aa
aa
nn
nn
cc
cc
ee
ee
dd
dd
oo
oo
pp
pp
tt
tt
ii
ii
oo
oo
nn
nn
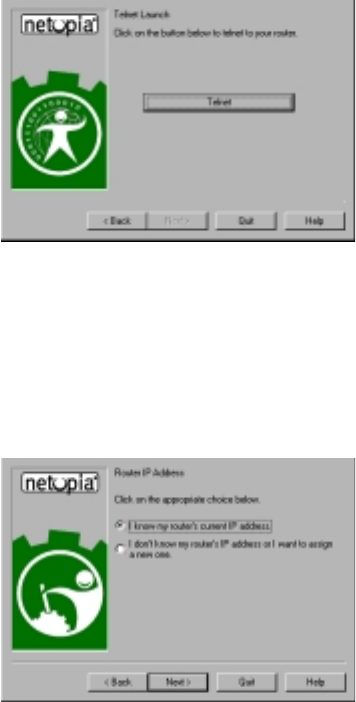
Additional Configuration screen. If you have a router that
has a permanent unswitched connection to your ISP, such
as a Netopia R5000 Series Router, the Additional
Configuration screen appears.
You may want to do additional configuration to customize
your network environment. SmartStart lets you launch
your Telnet application by clicking the Telnet button.
Advanced configuration options available via Telnet are
explained in “Console-Based Management” on page 6-1.
However, if you need no further configuration options,
click Quit. Congratulations! You’re finished!
Router IP Address screen. If you selected the Advanced
option in the “Setup options screen” on page 5-4,
SmartStart asks you to choose between entering the
router’s current IP address and assigning an IP address
to the router.
If the router has already been assigned an IP address,
select the first radio button. If you do this, the “Known IP
Address screen,” appears (shown below.)
If you want to reconfigure the router with a new IP address
and subnet mask, select the second radio button. If you
do this, the “New IP Address screen” on page 5-6
appears.
When you have done this, click Next.


