3 - 1
3. PARTS REPLACEMENT
This chapter explains how to replace parts, assemblies, and units in the field.
The replacement procedures to be explained here include dismounting, not mounting. When
mounting parts, assemblies, and units, reverse the dismounting steps.
3.1 Precautions for Parts Replacement
(1) Be sure to dismount the AC cord and interface cable before replacing parts.
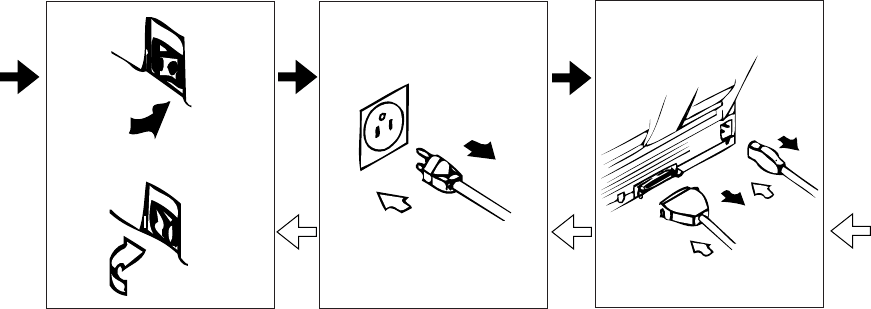
(a) Be sure to dismount the AC cord in the following procedures:
i) Turn off the POWER switch of the printer (“0“).
ii) Disconnect the AC inlet plug of the AC cord from the AC receptacle.
iii) Disconnect the AC cord and interface cable from the printer.
(b) Be sure to reconnect the printer in the following procedures:
i) Connect the AC cord and interface cable to the printer.
ii) Connect the AC inlet plug to the AC receptacle.
iii) Turn on the POWER switch of the printer (“|”).
(2) Do not disassemble parts as long as the printer is operating normally.
(3) Minimize disassembling. (Only the parts indicated in the parts replacement procedures can
be dismounted.)
(4) Use only the specified maintenance tools.
(5) Disassemble parts in the specified sequence; otherwise, parts may be damaged.
(6) Temporarily tighten small parts such as screws and collars to the original locations because
they tend to be lost easily.
(7) When handling ICs such as CPUs, ROM, and RAM and PC boards, do not wear gloves that
easily cause static electricity.
(8) Do not place PC boards directly on devices and floors.
ON
OFF
Dismounting
Reconnection


