239
Maintenance of the NT631/NT631C Section 7-3
NT631C-CFL02 (for NT631C-ST141@-EV2)
Procedure
1,2,3... 1. Turn the power supply to the PT OFF.
Be sure to do so to avoid an electric shock.
2. Disconnect the terminal block wiring, the communications cable, and the
printer cable. If a Memory Unit or Interface Unit is mounted, remove that
Unit also.
3. Loosen four screws at corners on the rear face of the NT631C, and remove
the rear case.
Be careful not to lose these screws.
From this step on, exert added care not to touch any electronic parts or
printed circuit boards inside the Unit. Otherwise the PT may sustain static
damage.
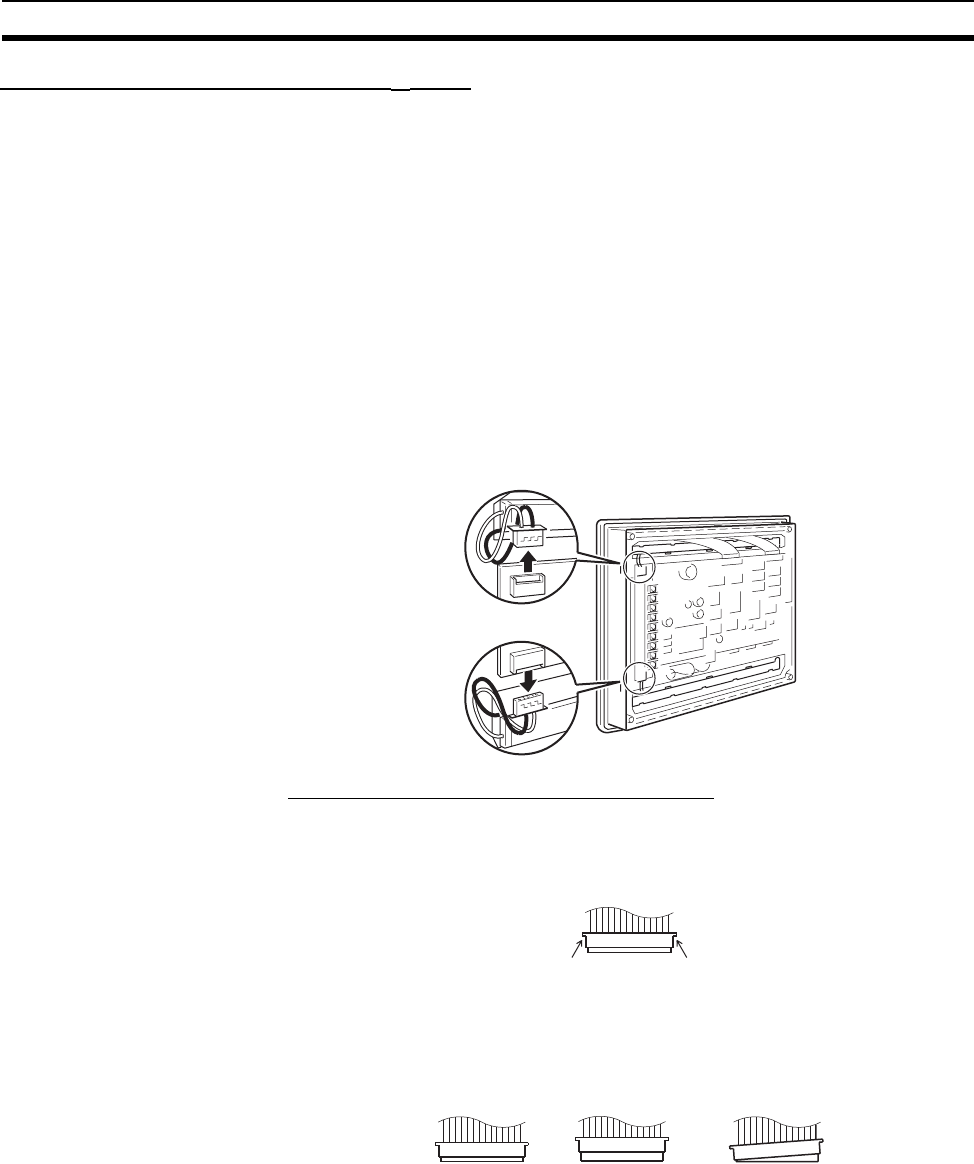
4. Disengage two backlight connectors at the top and the bottom, and pull out
two touch panel cables at the top.
Removing and Fitting The Touch Panel Cable
Removing The Touch Panel Cable:
Pull the arrow-marked sections up to the cable side to unlock the connector,
and remove the cable.
Fitting The Touch Panel Cable:
While unlocking the connector, insert the touch panel cable fully. Then, lock
the connector.
5. Loosen mounting screws, and remove backlights.
Shift the backlight to the right, and pull it out.
When loosening or tightening screws for backlights, be sure to use a mag-
netized Phillips screwdriver. If any screw falls inside the Unit, it must be ex-
tricated without fail.
Locked Unlocked
Not locked
completely


