23
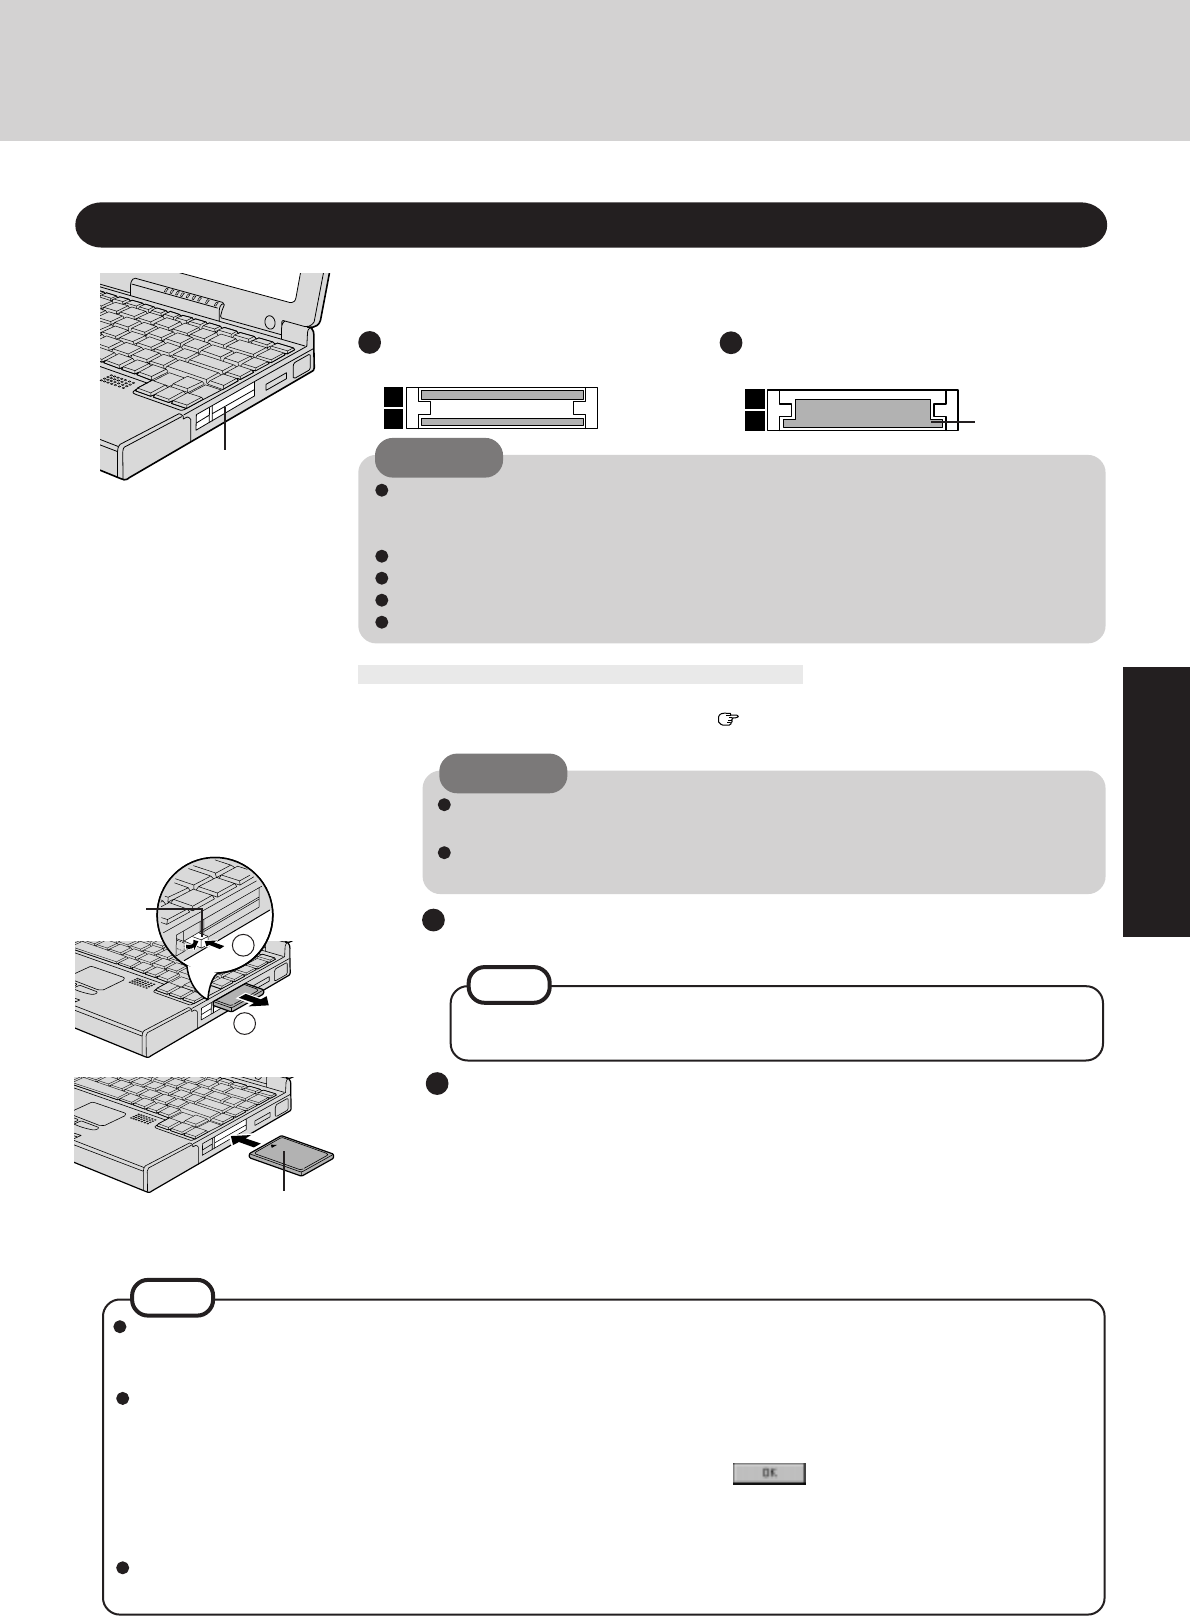
Your computer has two PC Card slots. These slots conform to the PC Card Standard; there-
fore, communications and SCSI devices may be utilized. The slot allows you to use two Type
I or Type II cards (or one Type I and one Type II), or one Type III card.
Using PC Cards
PC Card Slots
Button
1
2
Type I or II
Two cards can be used simultaneously.
Type III
One card can be used only in the bottom slot.
Bottom Slot
CAUTION
Please check the PC Cards’ specifications. Be sure the total operating current does
not exceed the specified limit. Damage may result otherwise.
Allowable Current (total for two slots) : 3.3 V: 400 mA, 5 V: 400 mA, 12 V: 120 mA
There are times when both a Type I card and a Type II card will not work at the same time.
SRAM and FLASH ROM (except for ATA interface) cards are not supported.
When using a CardBus type card, use only that card; do not insert any other PC Cards.
Only the bottom slot can support a Zoomed Video (ZV) card.
3
Turn your computer on
There are some PC Cards that require special or updated device driver be installed.
Follow the instructions on the screen and read any related manuals on how to install
these device drivers.
Installing the PC Card
Simply slide the PC Card in until it snaps into place.
Please refer to the manual for each card on how to install the card (insertion is
typically label-side up).
Label-side up
Removing the PC Card (or the dummy card)
NOTE
Pull the button out and then press it.
Dummy cards are provided at the time of purchase. They provide protection
for the PC Card slots against such things as dust.
2
CAUTION
Power off your computer ( page 10)
Do not shut down using the suspend or hibernation mode.
1
Do not install or remove peripherals while your computer is in the suspend or
hibernation mode; abnormal operation may result.
Before removing a PC Card, go to [Socket Status] (in [Start] - [Settings] - [Control
Panel] - [PC Card (PCMCIA)]), select the PC Card slot and press [Stop].
Installing/Removing the PC Card
You may need to install a driver from the Windows 95 CD-ROM (included) or a PC Card's floppy disk. Simply follow the
on-screen instructions and read the PC Card's operation manual on how to install the driver.
NOTE
PhoenixCard Manager95:
Follow the installation procedure below only if you will be using the ZV card. Otherwise, do not perform the installa-
tion; abnormal operation may result.
1
Set [Sound Chip] to [Automatic (PnP)] in the Setup Utility.
2
Select [Start] - [Run] and type [c:\util\phoenix\disk1\setup.exe] press , and then follow the on-screen in-
structions.
If PhoenixCard Manager95 has been reinstalled, follow the instructions in “Installing PhoenixCard Manager95" on
page 34.
After PhoenixCard Manager95 has been installed, make sure to power off the computer before installing or removing
the card. Also, do not use the suspend or hibernation functions if the card is installed.
