22
Chapter 1 Basic Menu Features
Quality Adjusting
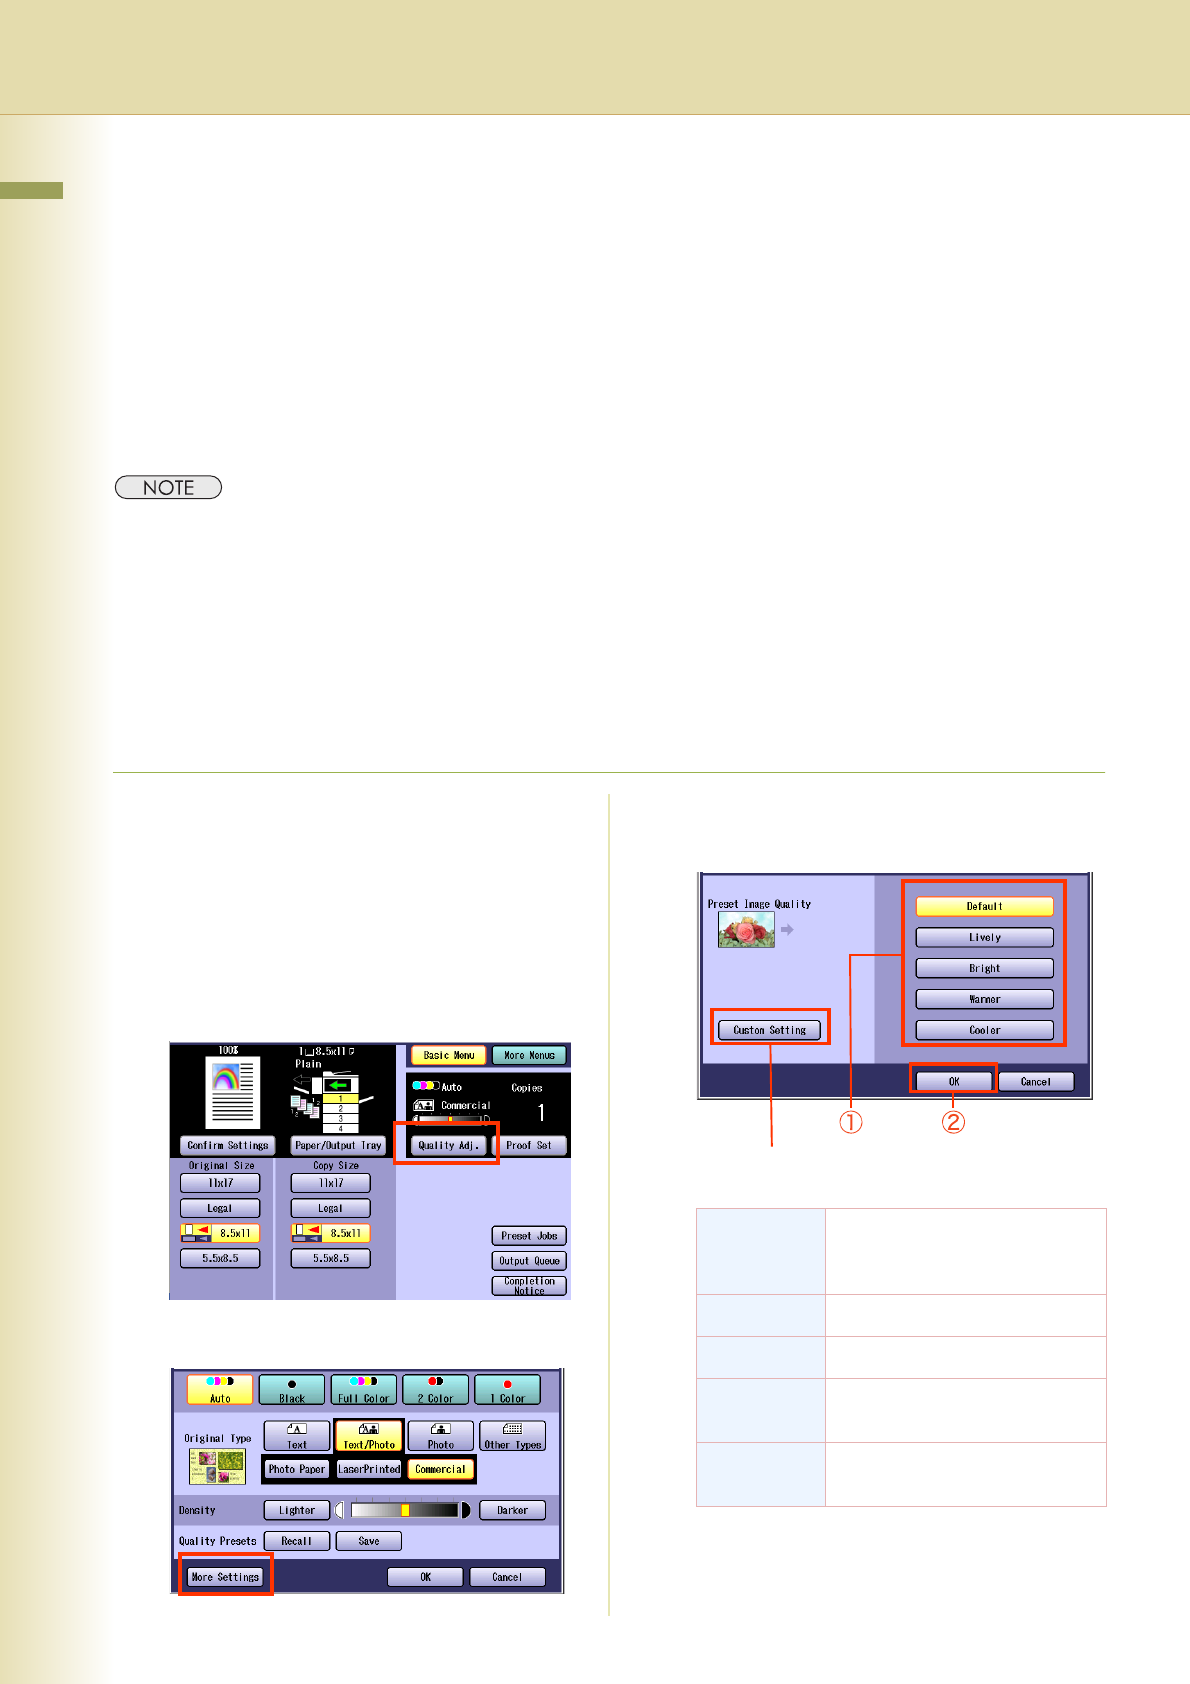
Image quality items can be easily set by selecting from 4 image quality types (Lively, Bright, Warmer,
and Cooler).
Additionally, in the Custom Setting selection, the following 7 image quality adjustments can be set.
• Background Removal
• BleedThrough Prevention
•Tint
• Contrast
• Sharpness
• Saturation
• Color Balance
zThe default setting of BleedThrough Prevention, Tint, Contrast, Sharpness, and Saturation can be changed.
Refer to Copier Settings (Key Operator Mode) in the Operating Instructions (For Function Parameters) of
provided CD-ROM.
zUnder the following situations, the Color mode settings return to the standard settings.
- If the Reset key is pressed.
- If Auto Reset Time interval has lapsed (default = 1 min).
- If the power is turned OFF.
-If “Default” is selected in “More Settings”.
zIf you select the Original Type after selecting the custom settings, the custom settings return to the standard
settings.
1
Place original(s).
zRefer to Placing Originals (Copy) in the
Operating Instructions (For Basic
Operations) of provided booklet.
2
Press the Copy key if the machine is
set to other function mode.
3
Select “Quality Adj.”.
4
Select “More Settings”.
5
Select an Image Quality type, and
then select “OK”.
zIf “TracingPaper” is selected in “Original
Type”, the BleedThrough Prevention is set
to 3 regardless of the selected image quality
type.
Default Copies with the default image
quality set by the function
parameters.
Lively Copies with lively image quality.
Bright Copies with bright image quality.
Warmer Copies with reddish color
accentuated.
Cooler Copies with bluish color
accentuated.
Custom Setting
(See pages 24 to 30)
