


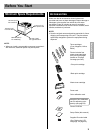

Setup
19
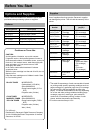
NOTE:
For Windows XP
•
If
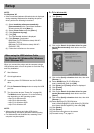
the Found New Hardware Wizard window is displayed
during restarting Windows after installing the printer
driver, perform the following instructions.
(1) Select Install the software automatically
[Recommended] in the Found New Hardware
Wizard window and click [Next >].
(2) Select Printer Driver and click [Next >].
(3) Click [Continue Anyway].
(4) Click [OK].
The Files Needed window is displayed.
(5) Click [Browse...] and select
PCL folder [D (CD-ROM drive letter):\WinXP \
ENGLISH \ PCL or
PS folder [D (CD-ROM drive letter):\WinXP \
ENGLISH \ PS].
(6) Follow the instructions on the screen.
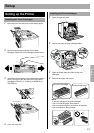
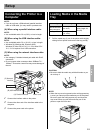
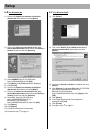
When you connect the printer and the computer using a
USB interface cable, turn off the printer to avoid the Plug
and Play installation.
1 Start Windows.
2 Quit all applications.
3 Insert the printer CD-ROM disk into the CD-ROM
drive.
4 Exit the Panasonic Setup window to setup the USB
port first.
5 Turn the printer on (see “Power On” on page 29).
The Wizard window appears. Go to the following
step depending on the operating system.
- step 6-A for Windows 98.
- step 6-B for Windows Me.
- step 6-C for Windows 2000.
- step 6-D for Windows XP.
NOTE:
• When using the printer and other USB device
simultaneously, we cannot guarantee normal printing.
• For Windows 98 and Windows Me, restarting of the
computer may be required.
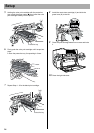
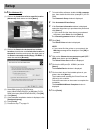
6-A (For Windows 98)
(1) Click [Next>].
(2) Click on the Search for the best driver for your
device [Recommended] check button and click
[Next>].
(3) Click on the Specify a location check box, then click
[Browse...].
(4) Select Win98 folder [D (CD-ROM drive
letter):\Usb\Win98], then click [OK].
(5) Click [Next>] until [Finish] window is displayed.
(6) Click [Finish].
(7) Click [Next>].
(8) Click on the Search for the best driver for your
device [Recommended] check button and click
[Next>].
(9) Click on the Specify a location check box, then click
[Browse...].
(10) Select Pcl folder [D (CD-ROM drive
letter):\Win9x\English\Pcl] or Ps folder [D (CD-ROM
drive letter):\Win9x\English\Ps], then click [OK].
(11) Click [Next>].
(12) Click [Next>].
(13) Follow the instructions on the screen.
(14) Proceed to step
7 on page 21.
When using the USB Interface Cable
(for Windows 98 / Windows Me / Windows
2000 / Windows XP):
Setup