


Setup
23
NOTE:
• The Easy Install installs the KX-CL510 printer
description file, USB printer class driver, ColorSync
profile and Status Display.
If you want to install the additional software “KX-Printer
Network Setup Tool”, select Custom Install to complete
the installation.
• The Status Display folder is created in the (Macintosh
HD:Panasonic:KX-CL510) folder after finishing
installation successfully.
If you install the “KX-Printer Network Setup Tool” using
the Custom Install, its folder is also created in the same
folder.
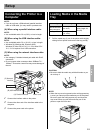
Step 2: Installing the Adobe PostScript
printer driver
1 Insert the KX-CL510 CD-ROM disk in your CD-ROM
drive, and then double-click the KX-CL510 icon, the
Mac OS folder and the English folder.
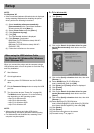
2 Double-click the AdobePS Installer icon in
accordance with the Macintosh OS version.
- AdobePS 8.7.2 Installer: Mac OS 8.6 / 9.0 / 9.1 / 9.2
- AdobePS 8.6 Installer: Mac OS 8.1 / 8.5
The Adobe PostScript Driver window is displayed.
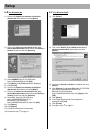
3 Click [Continue...].
The License window is displayed.
4 Click [Accept] to proceed this installation.
The AdobePS Installer window is displayed.
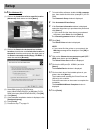
5 Click [Install].
The installation starts.
The “Installation was successful” will be displayed
after finishing installation.
6 Follow the instruction on the screen to complete the
installation.
NOTE:
• For best results any job sent to the printer should be
sent using the Adobe driver and the KX-CL510 PPD.
Provide the installer to all users who send jobs.
For Mac OS X 10.1 - Mac OS X 10.2
Step 1: Installing the KX-CL510 PPD
(PostScript Printer Description) file
and ColorSync profile
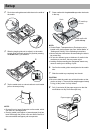
1 Insert the KX-CL510 CD-ROM disk in your CD-ROM
drive, and then double-click the KX-CL510 icon,
Mac OS X, English folder.
2 Double click the KX-CL510Install icon.
3 Follow the instructions to complete the installation.
NOTE:
• If you want to print Classic application documents, you
are required to install the KX-CL510 software for Mac
OS 9.2, then set the computer and printer. Refer to “For
Mac OS 8.1-Mac OS 9.2” in this section.
Set the computer (and printer) depending on the interface:
network (see below) or USB (see page 25).
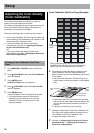
■ When using the Network Interface Cable
The following are the steps to set up network printing
using AppleTalk and TCP/IP.
Step 1: Setting up AppleTalk and TCP/IP on the computer
Step 2: Setting up TCP/IP on the printer
Step 3: Setting the PostScript printer driver
Step 1: Setting up AppleTalk and TCP/IP on
the computer
If the AppleTalk and TCP/IP of your computer are already
set, proceed to the next step. If they are not set, consult
with your network administrator. Regarding the
configuration of TCP/IP, refer to the help menu or
documentation for Macintosh.
NOTE:
• Refer to “Network” section in the Operating Instructions
about setting the AppleTalk and TCP/IP to your
Macintosh.
Setting the Computer (and Printer)
Setup