[DISPLAY OPTION] menu
64 - ENGLISH
Settings
[SHUTTER SETTING]
Set opening/closing of the shutter when power is
turned on and after the power is turned off.
1) Press
to select [SHUTTER
SETTING].
2) Press the <ENTER> button.
z
The [SHUTTER SETTING] screen is displayed.
3) Press
to select an item.
■
To set [STARTUP]
4) Select [STARTUP] in Step 3).
5) Press
to switch.
z
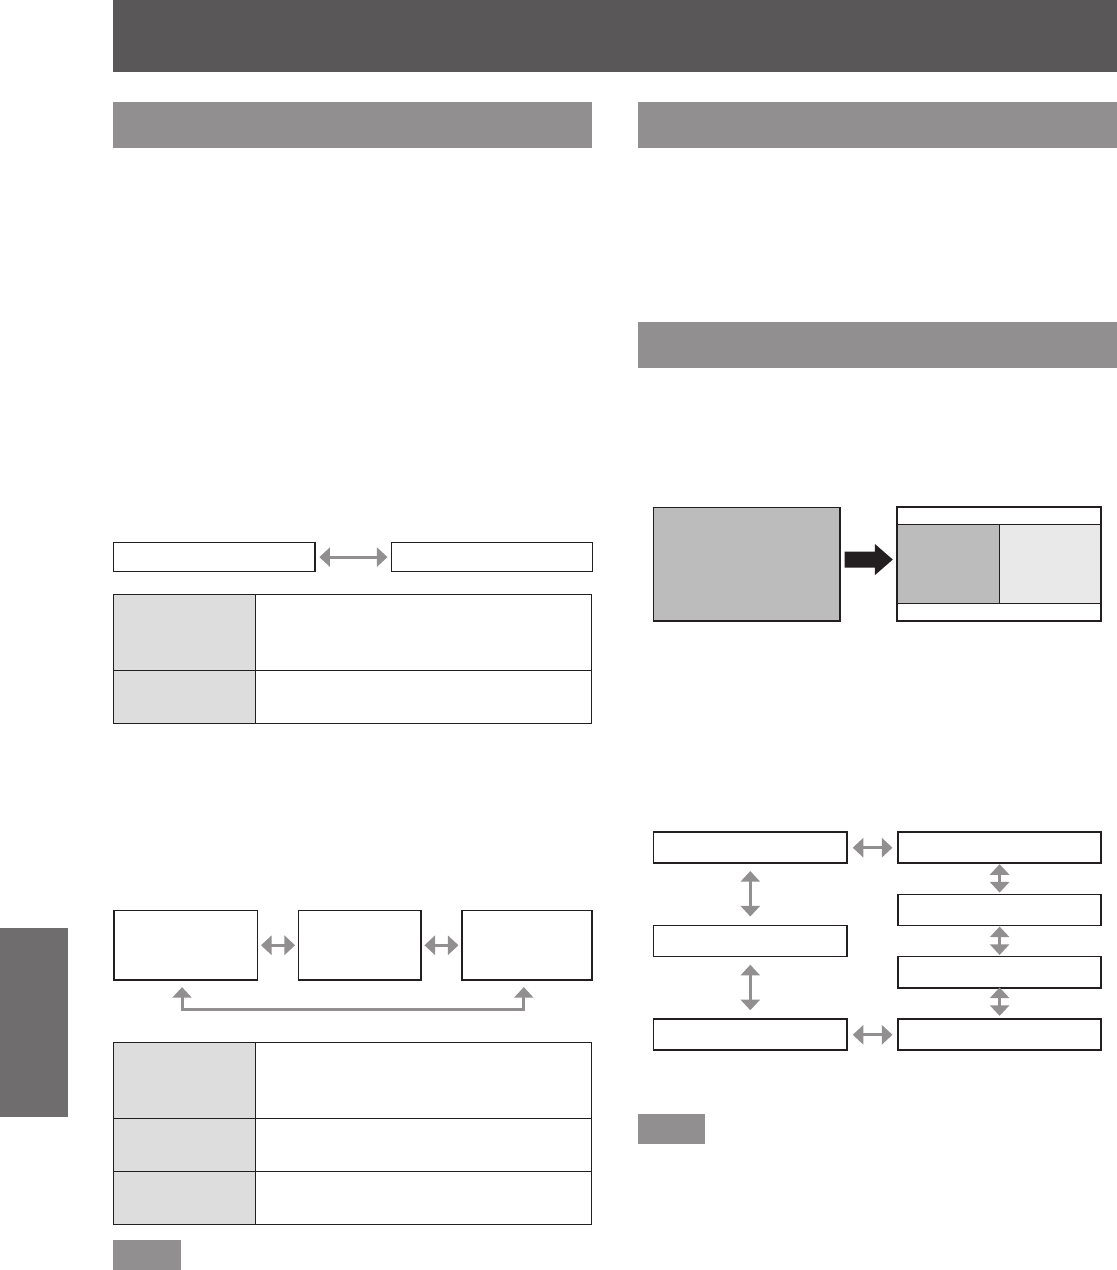
The setting will change as follows each time
you press the button.
[OPEN] [CLOSE]
[OPEN]
Projection begins with the shutter
opened when the power is turned
on.
[CLOSE]
Projection begins with the shutter
closed when the power is turned on.
■
To set [SHUT-OFF]
4) Select [SHUT-OFF] in Step 3).
5) Press
to switch.
z
The setting will change as follows each time
you press the button.
[KEEP
CURRENT
STATE]
[CLOSE] [OPEN]
[KEEP
CURRENT
STATE]
Enters standby with keeping the
shutter status before the power is
turned off.
[CLOSE]
Enters standby with the shutter
closed.
[OPEN]
Enters standby with the shutter
opened.
Note
z
When you remove the projection lens to transport
the projector, entering standby with the shutter
closed is recommended to prevent the dust.
z
The [POWER OFF(STANDBY)] screen is displayed
when the power is turned off regardless of the
shutter status.
[FREEZE]
The projected image is paused temporarily regardless
of the playback of the external equipment.
1) Press
to select [FREEZE].
2) Press the <ENTER> button.
z
Press the <MENU> button to release.
[SIDE BY SIDE]
Displays two different input signals simultaneously.
1) Press
to select [SIDE BY SIDE].
2) Press the <ENTER> button.
z
Displays the side-by-side screen.
Input A Input A Input B
3) Press the <MENU> button.
z
The [SUB INPUT SELECT] screen is
displayed.
4) Press
to select the image to be
displayed on the input B.
z
Press
to select an image to display on the
right side of the screen (Input B).
[VIDEO] [S-VIDEO]
[RGB1]
[OFF]
[RGB2]
[HDMI] [DVI-D]
5) Press the <ENTER> button.
Note
z
To cancel the two window display, select [OFF], and
press the <ENTER> button.
z
[FREEZE] is set on the Input A side.
z
During the two window display, menu items cannot
be adjusted or set.
z
The value of the Input A side is applied to
the [PICTURE] setting. (For [CONTRAST],
[BRIGHTNESS], [COLOR], [TINT], and
[SHARPNESS], respective values of both Input A
and B are applied.)
z
The two window display maintains the aspect ratio
selected with the <ASPECT> button on the remote
control or the setting of [ASPECT].
z
The two window display may not be available
depending on the combination of input signals.
Refer to “Two window display combination list”
(
page 117) for details.


