


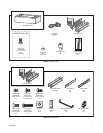
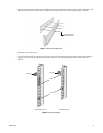
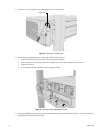
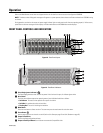

Figure 10. Attaching Rack Rail Spacers
C3683M (3/09) 17
c. Tighten the two screws to secure the spacer to the rack.
9. Repeat step 8 for the second spacer.
10. Tighten the 8-32 x 0.375-inch Philli
ps truss head screws that were attached to the front- and rear-mount rails in steps 3 and 4.
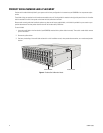
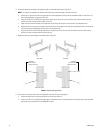
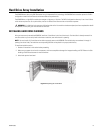
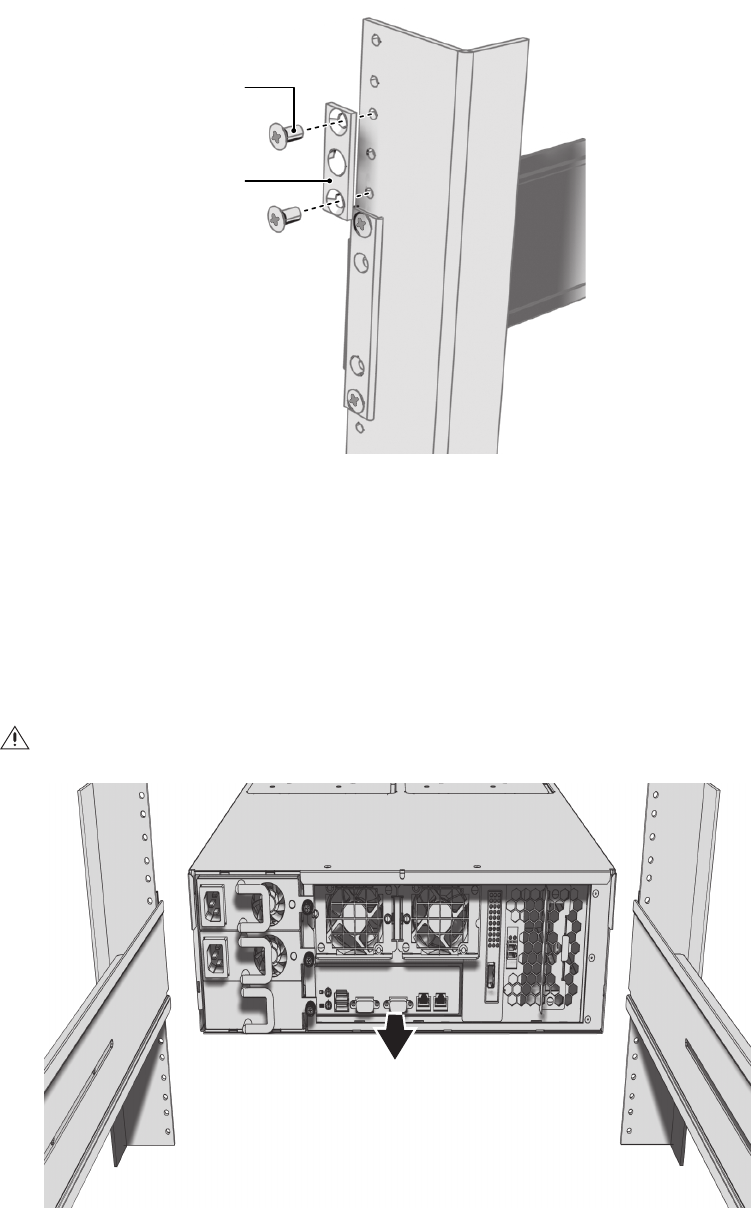
Figure 11. Mounting the NSM5200 into the Rack
11. Place the unit onto the mount rails by sliding the chassis brackets onto the rails. This step may require two people to lift
and slide the unit
into place. The unit should slide in and out of the rack easily.
NOTE: The NSM5200 stops mid-way in the
rack to facilitate system fan replacement. To pull the NSM5200 completely out of the rack,
press the clips on either side of the rack to release the unit.
WARNING: When sliding out the NSM5200, be careful not to let the unit fall out of the rack or equipment damage or personal injury
could result.
10-32 X 0.5
PHILLIPS
FLATHEAD
SPACER