


3-7SV61027 Rev. D
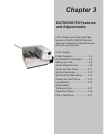
DA700/DA750 Features and Adjustments • 3
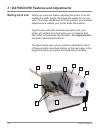
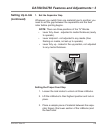
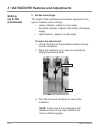
1. H-Block Separators
Adjust to the thickness of your material. The gap between
the H-Block separator fingers and the feed rollers should
be just enough to allow a single piece to feed through the
printer.
2. Interface Panel (Not Shown)
Located on the lower part of the rear cover, the panel has
the ON/OFF switch, parallel cable connector and power
cord receptacle.
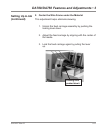
3. Wire Frame
Supports the material stack. Adjust the feed angle to ac
-
commodate the weight of the material you're running.
Adjust its side-to-side position so it's centered under the
stack.
4. Material Prop and Lock Knob
The prop adds a gentle slope to the stack to help feeding.
Adjust so the top of the prop is even with the top of the
stack. Secure the prop with the lock knob.
5. Wire Frame Slide and Wire Frame Slide Lock Lever
(Not Shown)
Slides the wire frame side to side. Lock in position with the
lock lever.
6. Feed Fence (Not Shown)
Helps confine the stack. Adjust to the width of your material
plus 1/16" clearance.
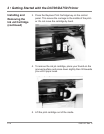
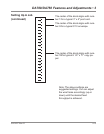
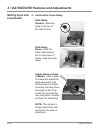
Setting Up A Job
(continued)