7
IKVM-1000 directly. The USB connectivity only supported in windows
2000/XP/server 2003 and the response time of USB connection would be longer
than LAN connection.
2. Insert the bundled CD-ROM into the CD-ROM drive to initiate the autorun pro-
gram. Click on “Setup Utility” hyperlink in the menu screen to execute the
program.
If the menu screen is not shown, you can click “Start” button and choose “Run…”.
When the dialog box appears, enter “E:\utility\psetup.exe” (suppose “E” is your
CD-ROM drive) and click “OK”.
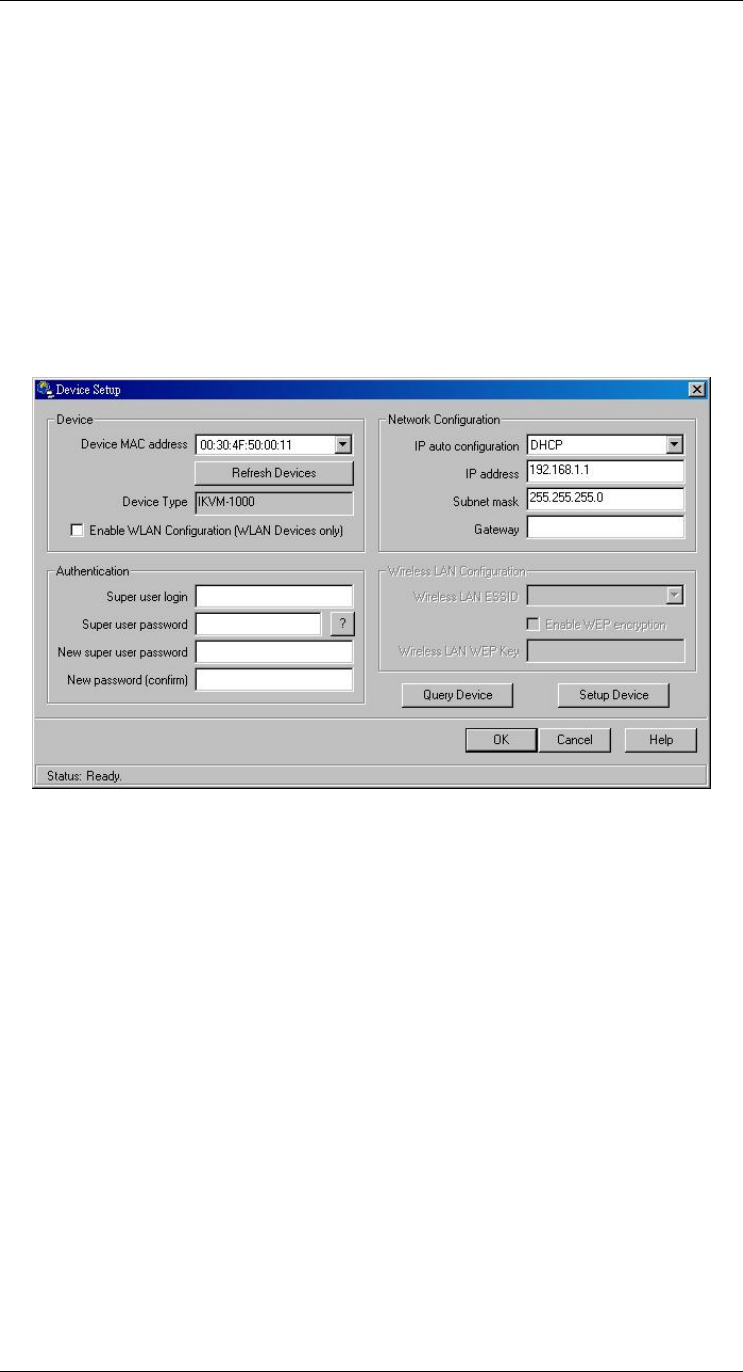
3. Once the utility is executed, it will search for available IKVM-1000 automatically.
4. On the upper left corner, the MAC address of the IKVM-1000 is displayed. To
manually detect the MAC address again, press the button “Refresh Devices”.
The displayed MAC address is the same MAC address printed on the sticker
placed on the bottom of the IKVM-1000. If the IKVM-1000 is connected via USB,
it is classified as an USB device and an appropriate drive letter is chosen for this
device.
5. On the lower right corner of the window, there are two buttons: “Query Device”
and “Setup Device”. Press the “Query Device” button to display the preconfig-
ured values of the network configuration. The values are displayed in the text
fields located above. If necessary, adjust the network settings according to your
requirement. To save the changes, enter “super” in the “Super user login” field
and “pass” in the “Super user password” field. Then press the “ Setup Device
“ button.
6. On the lower left Authentication field, you can change the super user password
here. However, the super user name is fixed to “super” and can’t be modified.


