


C–Flash Update
QLogic Adapter Flash Update — Windows Server
NE0154601-00 A C-3
3. Format the USB flash device to a FAT file system (if required):
a. Right-click the Start menu, and then click Explore.
b. Right-click the USB flash drive, and then click Format.
c. Format the USB flash drive to a FAT file system.
4. Unzip the NX Live USB file into its own directory.
a. Right-click the file and click Open With, and then click Compressed
(zipped) Folders.
b. Copy the two folders boot and slax onto the USB flash drive.
5. On the Start menu, click Run. Type cmd in the Open: box, and then click
the OK button.
6. Change to the drive letter assigned for the USB flash drive, for example:
C:\Documents and Settings>F:
7. Change the directory to the boot folder on the USB flash drive.
8. Execute the bootinst.bat file. Press the ENTER key twice to complete
the process of making the USB flash drive bootable.
9. Insert the NX Live USB flash drive into the server with the QLogic adapter.
10. Change any BIOS settings to permit the USB flash drive to boot before the
other devices on the system.
11. Use the menu options (see NX Live Menu Options) to show current board
information, update the firmware, or reboot the system (remember to
remove the NX Live USB if you need to revert back to the OS on the hard
disk).
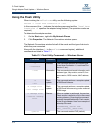
NX Live Menu Options
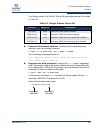
Here is an example of the NX Live menu options:
NX Live Firmware Update
Menu Options:
1. Show adapter information
2. Update to latest firmware on adapter
3. Reboot system if firmware has been updated
Enter here:
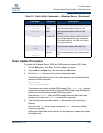
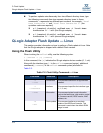
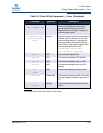
QLogic Adapter Flash Update — Windows Server
This section provides information on how to perform a Flash update in Windows
Server 2003 and 2008. Note that the QLogic adapter is shipped with a default
Flash version.