


Quatech, Inc. AirborneDirect™ User Manual
78 2/21/2011 100-8510-110
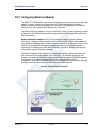
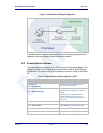
22.0 Replacing a Serial Cable
The serial device servers can be configured to act as a cable replacement using either an
AdHoc or Infrastructure network. In this application you will need two (2) Quatech Serial
device servers. Once configured the two devices will automatically connect and make a
virtual serial connection between the two serial ports across the 802.11 network.
To establish the cable replacement one device will be the master and one the slave. It
does not matter which end of the serial connection is which. The master initiates the
network connection and the slave waits for the master to connect. The following Table 43
and Table 44 identify the required configurations for the Master and Slave. The
configuration is for a single serial port, the same configuration can be used with those
devices that support two serial connections.
The configurations in Table 43 and Table 44 use an AdHoc network. An infrastructure
network can be used as long as static IP configuration is used for the slave device.
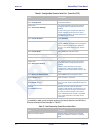
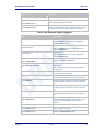
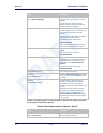
Table 43 - Cable Replacement - Slave Configuration
Step
Description
Configure the device to use an AdHoc
network
See section 17.2
After the Commit at the end of the configuration press the
Reload Button.
Configure the device to use a static IP
address on the WLAN interface
See section 19.3
After the Commit at the end of the configuration press the
Reload Button.
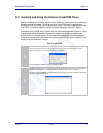
Configure the device to listen for a
connection on the tunnel port
See section 20.2
After the Commit at the end of the configuration press the
Reload Button.
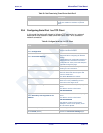
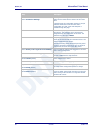
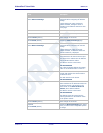
Navigation Bar
Select Configuration
You will see a group of fields under the banner of Interface and
Network Parameters.
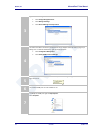
Feature Link
Select Serial Port Settings
The wireless interface and security must be configured before
configuring the Ethernet settings.
A page showing the configuration options for TCP/IP and UDP
connections to the device. Configuration of Telnet, HTTP and
SSH ports is possible through this page.
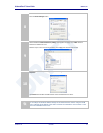
Select Serial Port Bit Rate
Select the appropriate bit rate to match the serial port the
device will be connected to.
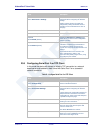
Select Parity
Select the parity setting to match the serial port the device will
be connected to, from the drop down list.
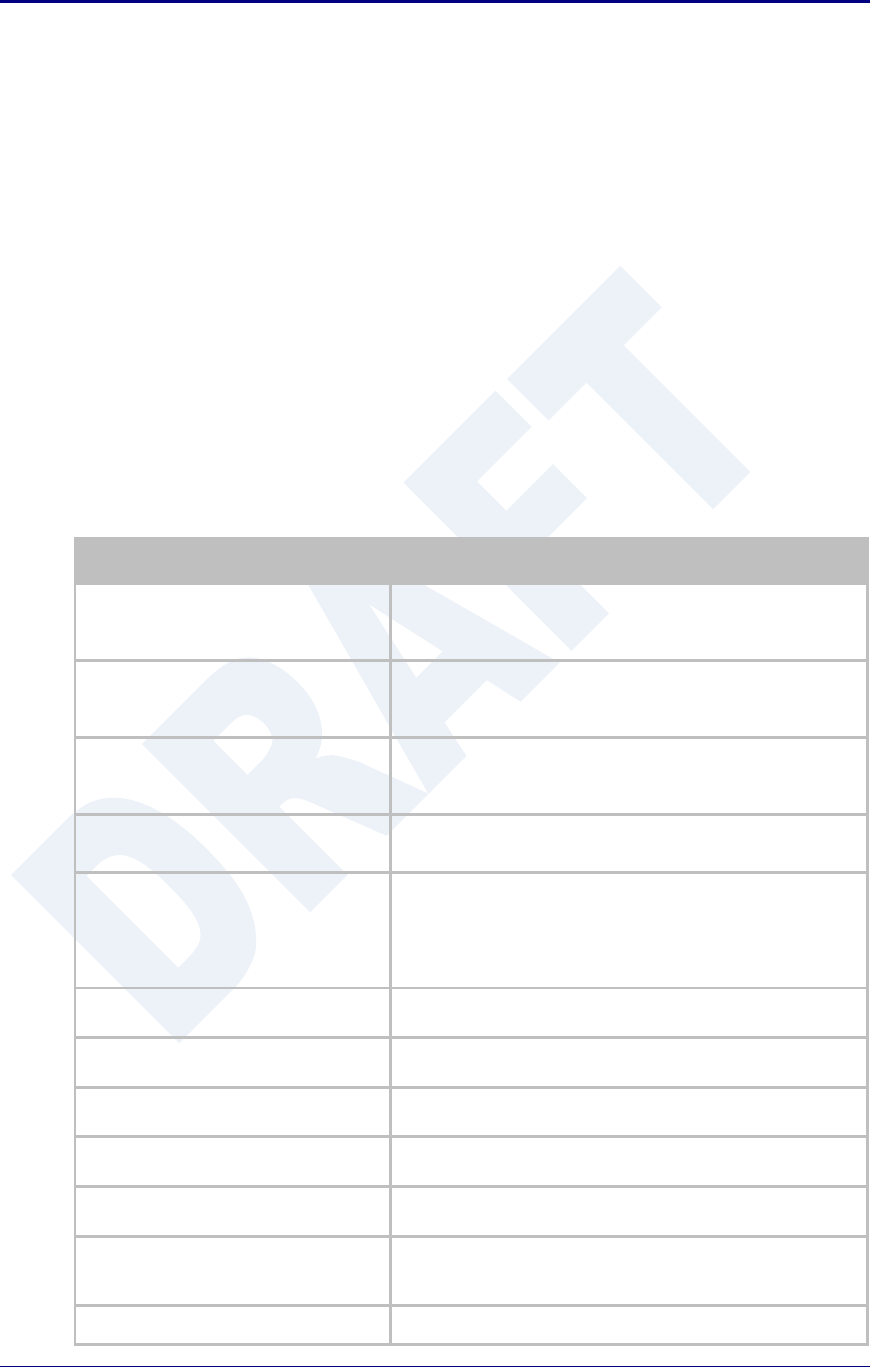
Select Data Bits
Select the number of data bits to match the serial port the
device will be connected to, from the drop down list.
Select Stop Bits
Select the number of stop bits to match the serial port the
device will be connected to, from the drop down list.
Select Flow Control
Select the flow control option to match the serial port the device
will be connected to, from the drop down list.
Optional
Select Serial Assert
Select the option to match the serial port the device will be
connected to, from the drop down list. This is only required if
software flow control has been selected.
Press Commit [Button]
Saves changes to the device.