CHAPTER 3: OPERATION 5
Chapter 3: Operation
Use the Configuration Menu is to specify your MCIP configuration and to set or change operation
parameters.
1. Activate the On-Screen User Interface (OSUI) by pressing the Hot Key (default: Left CTRL
key on keyboard) three times rapidly. When the OSUI appears, press F4 to access the
Configuration Menu.
Note: Currently, Hotkey function is not enabled for further change.
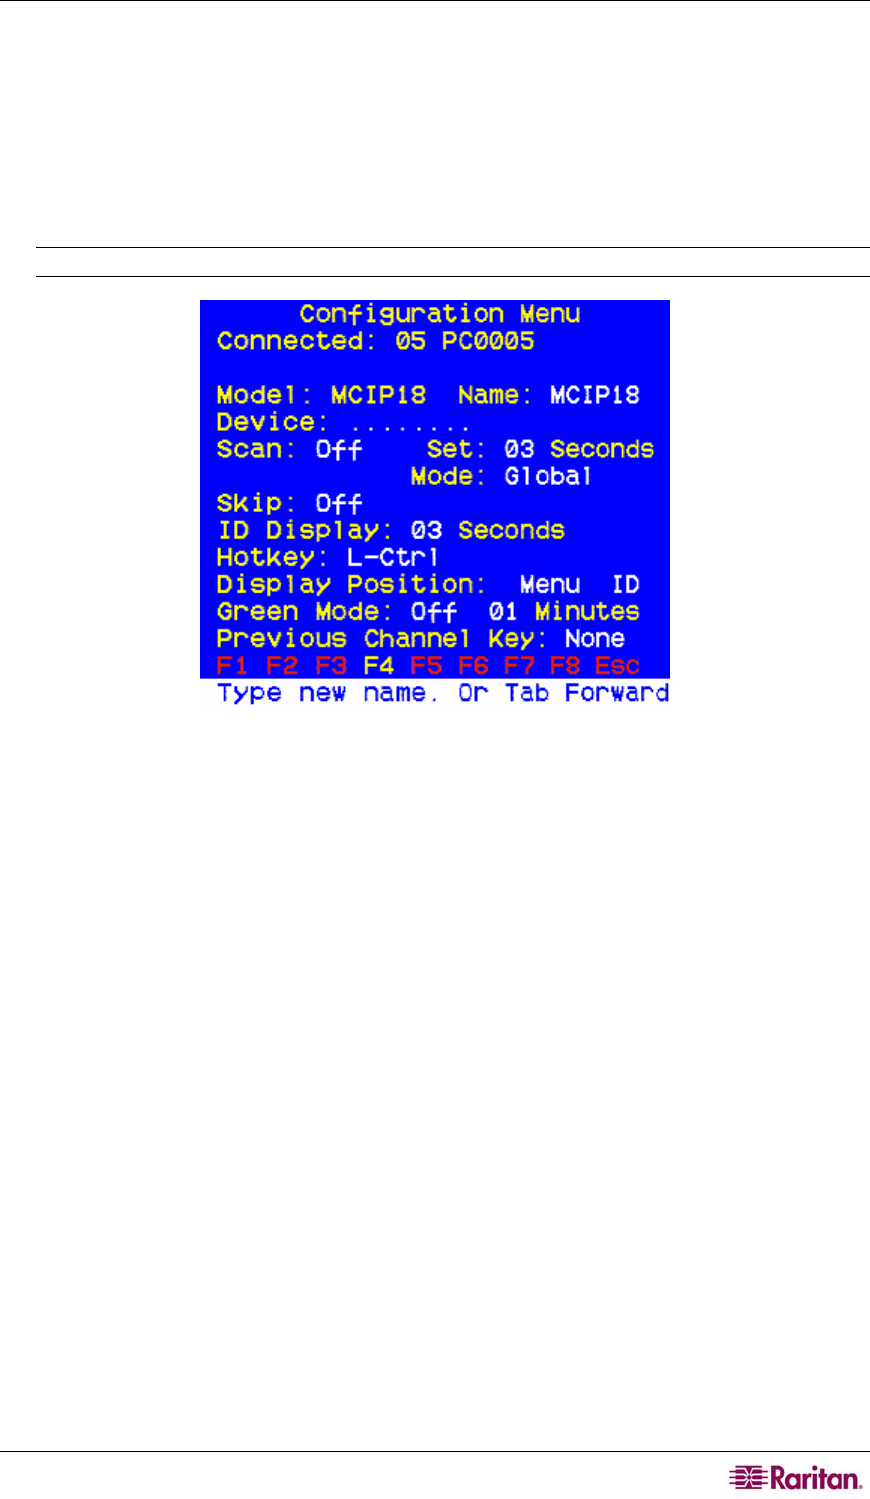
Figure 5 Configuration Menu
a. The Connected field displays the Channel ID and Name of the currently selected
computer.
b. The Model field displays the model number of this MasterConsole unit.
2. Use the Tab (forward)/Shift + Tab (backward) keys to highlight the desired field and make
your changes as follows:
a. To change Name (default is the unit’s model number): Move to Name and type a name
up to seven characters. This field is used for identification purposes only.
b. To turn AutoScan ON/OFF (default is OFF): Move to Scan and press the Ç / È keys to
toggle. If you exit the OSUI with AutoScan ON, MCIP will scan according to the
currently set mode (Individual/Global) and scan rate.
To change the Global Scan Rate (default is 3 seconds): Move to Set and type a
number from 01 to 99, or press the Ç / È keys to specify the Scan Rate (in seconds)
for Global AutoScan.
To change AutoScan mode (default setting is Global): Move to Mode and press
the Ç / È keys to toggle between Global and Individual.
c. To turn AutoSkip ON/OFF (default is OFF): Move to Skip and press the Ç / È keys to
toggle. With AutoSkip ON, only active channels can be selected.
d. To change the ID Display time interval (default is 3 seconds): Move to ID Display and
type a number from 01 to 99, or press the Ç / È keys to specify the interval (in seconds)
you want the Channel ID and Name to display when each computer is selected. Type 99
if you want the Channel ID and Name to display continuously.
e. Green mode is disabled.
f. Previous channel key function is disabled.


