CHAPTER 3: OPERATION 9
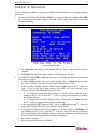
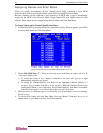
b. As the computer status changes (active/inactive), the MCIP updates the Status column
periodically. To enable a user to see the new status immediately, activate the OSUI and
press F8-Upgrade Computer Status. The MCIP will scan the channels and update the
computer status and then return to the previous menu.
c. For any inactive channel, the ID bar will display only the channel ID and not the name
field, when sorted by channel and will not display anything when sorted by name-F12
toggle.
d. The non-displayed names are still available in the MCIP internal database and can be
edited with the F3 function.
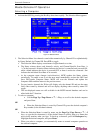
4. To select a computer:
Use the Page Up / Page Down or Ç / È keys to highlight the desired computer
and press Enter
OR
When the Selection Menu is sorted by Channel ID, press the desired computer's
Key number (shown in the left-hand column);
OR
When the Selection Menu is sorted by name (arranged alphabetically), use the
Page Up / Page Down or Ç / È keys, or type the first character(s) of the desired
Name to quickly jump to the Name that most closely matches what you type. To back
up a character, press the Backspace key. Highlight the desired computer, and press
Enter.
a. When you select a computer, you automatically return to normal computer operation at
the selected computer.
b. The Channel ID and Name will be displayed on the monitor for the time interval
specified in the Configuration Menu.
c. Press Home at any time to return to the first page of the Configuration Menu (for 16-
channel.
Activating AutoScan
1. Activate the OSUI by pressing the Hot Key three times rapidly. Press the F6 Key.
2. On the front panel of the MCIP unit, a green light next to the Scan button will illuminate.
3. The unit will scan according to parameters set in the Configuration Menu.


