


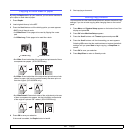

8.3 <
Scanning>
5 Select the index number, from 1 to 20.
6 Enter a name in Alias for the Setup for the corresponding Server
List entry. This name will be displayed on your machine.
7 Select IP Address or Host Name.
8 Enter the server address in dotted decimal notation or a host name.
9 Enter the server port number, from 1 to 65535.
The default port number is 21.
10 Put a check mark in Anonymous if you want to allow the FTP
server to be accessed by unauthorized persons.
By default, this is unchecked.
11 Enter the login name and password.
12 Enter the location the scanned image will be stored. This is the
location you have entered in the step 6.
13 Click Apply.
Setting up an SMB server
To use an SMB server, you need to set up parameters for access to SMB
servers using SyncThru™ Web Service.
1 Enter your machine’s IP address as the URL in a browser and click
Go to access the web site of your machine.
2 Click Machine Settings and SMB Setup.
3 Click Server List.
4 Click Add.
5 Select the index number, from 1 to 20.
6 Enter a name in Alias for the Setup for the corresponding Server
List entry. This name will be displayed on your machine.
7 Select IP Address or Host Name.
8 Enter the server address in dotted decimal notation or a host name.
9 Enter the server port number, from 1 to 65535.
The default port number is 139.
10 Enter the share name of the server.
11 Put a check mark in Anonymous if you want to allow the SMB
server to be accessed by unauthorized persons.
By default, this is unchecked.
12 Enter the login name and password.
13 Enter the domain name of the SMB server.
14 Enter the location the scanned image will be stored. This is the
location you have entered in the step 6.
15 Click Apply.
Scanning to a network client
Network client allows you to remotely scan an original from your network-
connected machine to your computer in JPEG, TIFF, or PDF file format.
Scanning
1 Make sure that your machine and the computer are connected to a
network and Network Scan is running on the computer.
2 Load originals face up into the ADF, or place a single original face
down on the scanner glass.
For details about loading an original, see page 5.1.
3 Press Scan/Email.
4 Press the Scroll buttons until NetScan appears on the bottom line
of the display and press OK.
5 Enter the ID you have set in the Samsung Network Scan Manager
window and press OK.
6 Enter the PIN you have set in the Samsung Network Scan
Manager window and press OK.
7 If the Reservation option you have set in the Windows Network
application is On, scanning is started. Or, the Reservation option is
Off, go to the next step.
8 If the scan destination is folder type, press the Scroll buttons until
the scan setting option you want appears and press OK. Or, press
Start to immediately start scanning using the default settings.
• Scan Size: Sets the image size.
• Original Type: Sets the original document’s type.
• Resolution: Sets the image resolution.
• Scan Color: Sets the color mode.
• Scan Format: Sets the file format in which the image is to be
saved. If you select TIFF or PDF, you can select to scan multiple
pages.
If the scan destination is application type, go to the step 11.
9 Press the Scroll buttons until the desired status appears and press
OK.
10 Press Start to start scanning.
Your machine begins scanning the original to the computer where
the program is running.
11 Press the Scroll buttons until the application you want appears and
press OK. Scanning is started.