INSTALLATION AND SETUP
2.8 C
HAPTER
T
WO :
I
NSTALLATION AND
S
ETUP
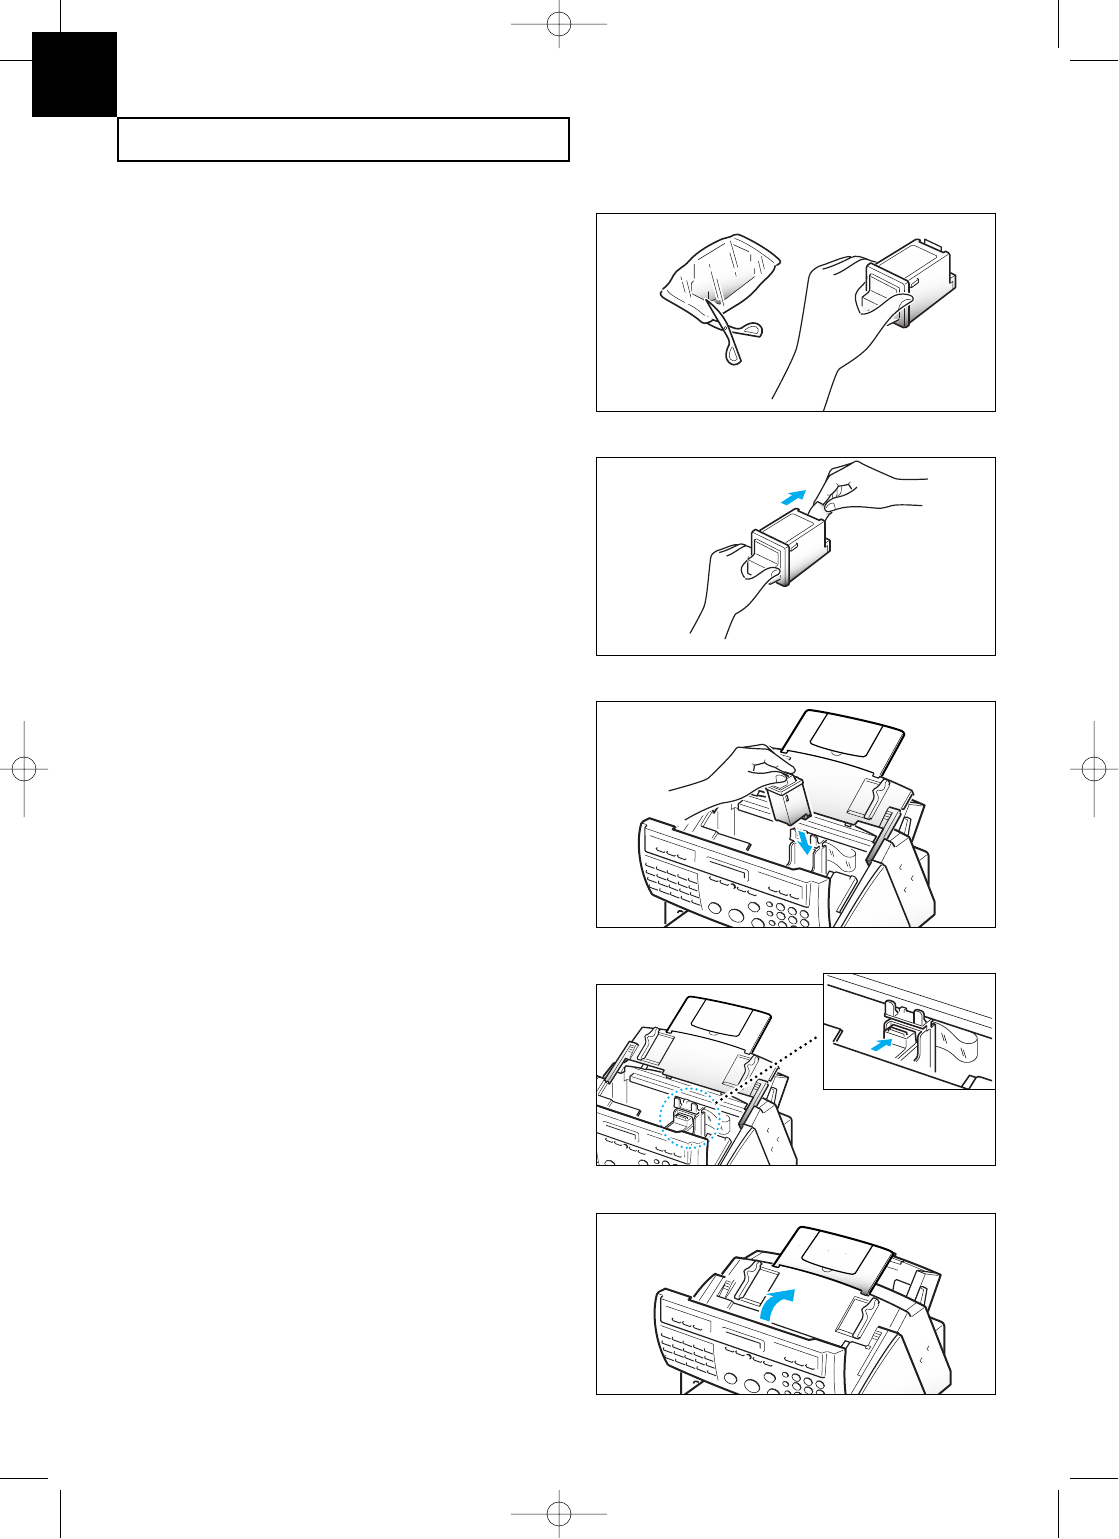
6. Push the cartridge firmly in the
direction of the arrow until it clicks
into place.
7. After installing the print cartridge,
replace the top cover and the control
panel to their normal positions.
4. Carefully remove the tape covering the
printhead. Be sure to remove all the
tape.
Do not touch the copper area.
5. Insert the print cartridge in the carrier.
3. Remove the print cartridge from its
packaging. Hold the print cartridge by
the black areas or colored top only.
Do not touch the copper area.
2
G-Chapter 2(US) 4/16/98 8:30 AM Page 2.8


