


Unit 4: Printer Configuration
CT4i Series Operator Manual 4-4
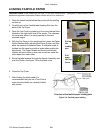
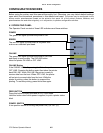
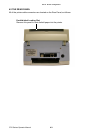
4.3 THE CONFIGURATION PANEL
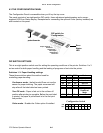
The Configuration Panel is accessible when you lift up the top cover.
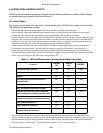
The panel consists of an eight-position DIP switch, three adjustment potentiometers and a seven-
segment LED Error Status display. Receptacles for connecting the optional Cutter (factory installed) are
also located on this panel.
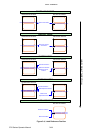
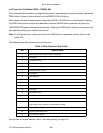
DIP SWITCH SETTINGS
This is an eight-position switch used for setting the operating conditions of the printer. Switches 1 to 3
act as control for both paper handling and the loading of programs or fonts into the printer.
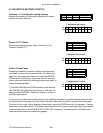
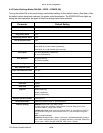
Switches 1–3: Paper Handling settings
These three switches select the method used for
controlling paper handling:
Continuous mode - (default mode) Does not use the
sensor for paper indexing. The paper movement will
stop after all the label data has been printed.
Tear Off mode - Paper is fed out to the cut/tear off
position after printing is complete. Before the next label
is printed, the paper is pulled back in to the first print
line position.
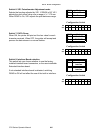
Cutter mode - Enables the Cutter option if installed.
DIP switch for
Configuration
Error
Status
LED
VR1
potentiometer
Paper handling
Reserved
Head Check
VR1 adjust
DATA Dump
Reserved
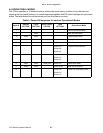
DSW1 DSW2 DSW3 Mode
Off Off Off Continuous
Off Off On Linerless
On Off Off Tear Off
Off On Off Cutter
On Off On Program
Download
Mode
Off On On Load Font
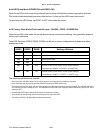
Configuration Switch
ON
OFF
12345678