


Unit 7: Replacement Procedures
SATO MB2i Service Manual PN 9001145B Page 7-14
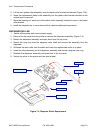
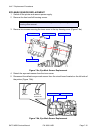
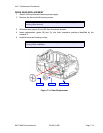
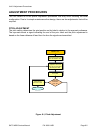
4 Remove one screw securing the defective sensor to the printer chassis.
5 Remove two screws securing the main circuit board to the printer chassis.
6 Withdraw the main circuit board from the printer chassis and disconnect the defective
cover-open sensor.
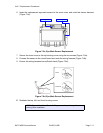
7 Connect the replacement cover-open sensor to the circuit board.
8 Secure the main circuit board to the to the printer chassis using two screws.
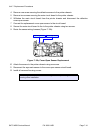
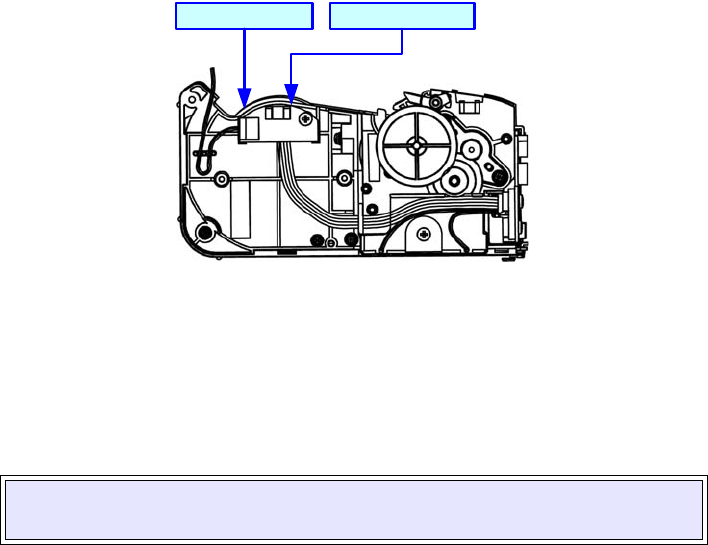
9 Route the sensor wiring harness (Figure 7-10b).
Figure 7-10b, Cover-Open Sensor Replacement
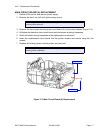
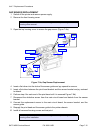
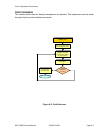
10 Attach the sensor to the printer chassis using one screw.
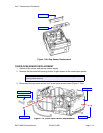
11 Reconnect the eye-mark sensor to the cover-open sensor circuit board.
12 Install all removed housing covers.
NOTE: Figure 9-1 of the Charts & Diagrams unit provides guidance on
housing cover installation.
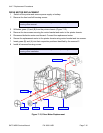
Eye-Mark Sensor Cover-Open Sensor