


8-49
TROUBLESHOOTING
Contents
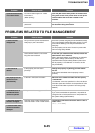
The operation panel
cannot be used.
Does the message "Call for service.
Code:xx-xx*." appear in the touch
panel?
*Letters and numbers appear in xx-xx.
Switch the power off and then restart the machine.
Make sure that the LINE indicator is not lit and that the
DATA indicator is not blinking or lit and then switch off
the [POWER] key ( ) and the main power switch.
Wait at least 10 seconds and then switch the main
power switch and the [POWER] key ( ) back on in
that order.
If the message still appears after switching the
[POWER] key ( ) and main power switch off and on
several times, it is likely that a failure has occurred that
requires service. In this event, stop using the machine,
unplug the power plug, and contact your dealer or
nearest authorised service representative. (When
contacting your dealer or nearest authorised service
representative, inform them of the displayed error code.)
Printing is not
possible or stops
during a job.
Is a tray out of paper? Add paper as instructed by the message in the
touch panel.
Is the machine out of toner? Replace the toner cartridge.
When toner runs low, a message will appear to inform
you that the toner cartridge must be replaced. To
replace the toner cartridge, see "MAINTENANCE"
(page 1-69) in "1. BEFORE USING THE MACHINE".
Has a paper misfeed occurred? Remove the misfeed as instructed by the message
in the touch panel.
☞ REMOVING MISFEEDS (page 8-8)
Is the output tray full? Remove the output from the tray and resume
printing.
When the output tray becomes full, a detector activates
and stops printing.
In the Paper Tray Settings of the system
settings, are restrictions placed on the
trays that can be used in each mode
(copy, print, fax, Internet fax, and
document filing)?
Check the Paper Tray Settings and see if
checkmarks appear in the checkboxes of each
mode (Feeding Approved Job). Functions without a
checkmark cannot be used for printing using that tray.
➞ System Settings > "Paper Tray Settings" > "Tray
Settings" > "Change" > (Each mode)
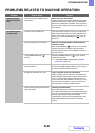
The original size is not
automatically selected
or the wrong size is
selected.
Is the original curled or folded? Straighten the original.
The correct original size cannot be detected if the
original is curled or folded.
Did you place an original smaller than
A5 (5-1/2" x 8-1/2") size?
Enter the original size manually.
Original sizes smaller than A5 (5-1/2" x 8-1/2") cannot
be detected.
When scanning a small original on the document glass,
it is convenient to place a blank sheet of paper on top of
the original which is the same size A4 (8-1/2" x 11"), B5
(8-1/2" x 11"R), etc.) as the paper that you wish to use
for printing.
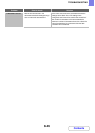
The displayed bypass
tray paper size is not
correct.
Is the bypass tray extension pulled out? Pull out the bypass tray extension.
When loading paper in the bypass tray, be sure to pull
out the extension to enable the paper size to be
detected correctly.
Problem Point to check Solution