


SonicWALL SSL VPN 4000 Getting Started Guide Page 17
Connecting the SonicWALL SSL VPN 4000
Before continuing, reference the diagrams on the following pages to connect the
SonicWALL SSL VPN 4000 to your network. Refer to the table in “Selecting a
SonicWALL Recommended Deployment Scenario” on page 4 to determine the proper
scenario for your network configuration.
• “Scenario A: Connecting the SonicWALL SSL VPN 4000” on page 17
• “Scenario B: Configuring Your Network Interface” on page 18
• “Scenario B: Connecting the SonicWALL SSL VPN 4000” on page 19
• “Scenario C: Configuring Your Network Interface” on page 19
• “Scenario C: Connecting the SonicWALL SSL VPN 4000” on page 20
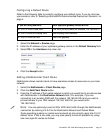
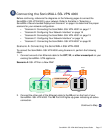
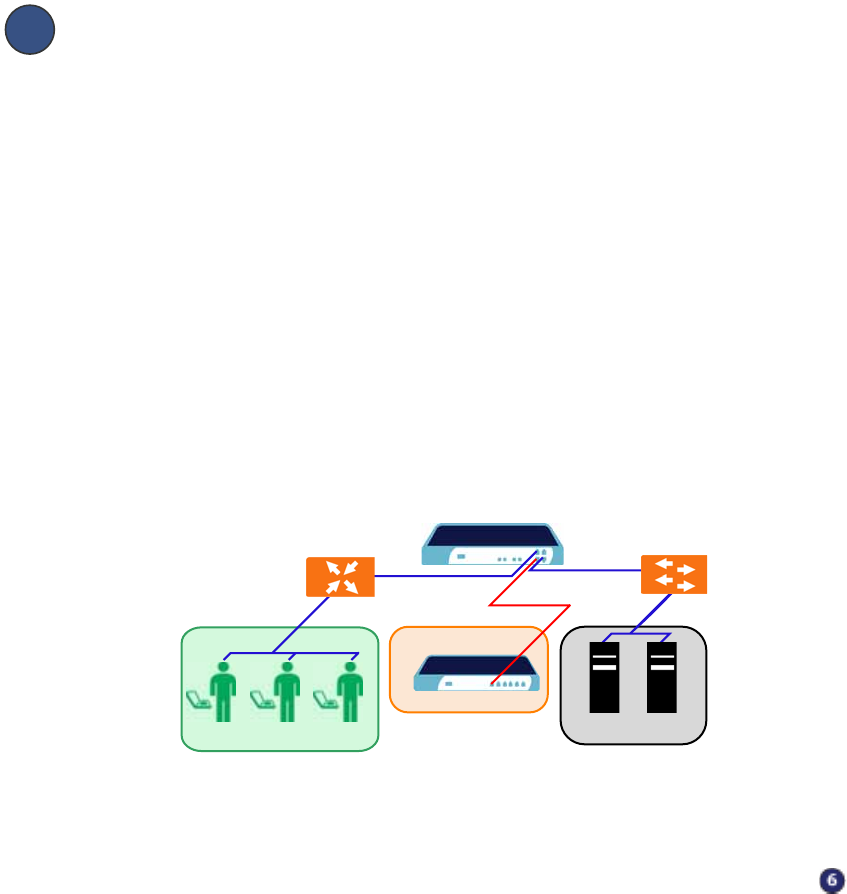
Scenario A: Connecting the SonicWALL SSLVPN 4000
To connect the SonicWALL SSL VPN 4000 using Scenario A, perform the following
steps:
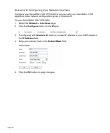
1. Connect one end of an Ethernet cable to the OPT, X2, or other unused port on your
existing SonicWALL UTM appliance.
Scenario A: SSL VPN on a New DMZ
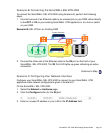
2. Connect the other end of the Ethernet cable to the X0 port on the front of your
SonicWALL SSL VPN 4000. The X0 Port LED lights up green indicating an active
connection.
Continue to Step
SonicWALL UTM Appliance
DMZ
X1
X0
OPT, X2, etc.
SonicWALL SSL-VPN 4000
X0
Router
Switch/
Hub
Remote Users
Network Nodes
Internet Zone
LAN