Page 52
Registering Your SonicWALL SSLVPN 4000
Before You Register
Verify that the time, DNS, and default route settings on your SonicWALL SSL VPN are
correct before you register your appliance. To verify or configure the time settings,
navigate to the System > Time page. To verify or configure the DNS setting, navigate to
the Network > DNS page. To verify or configure the default route, navigate to the
Network > Routes page.
You need a mySonicWALL.com account to register the SonicWALL SSL VPN 4000. You
can create a new mySonicWALL.com account directly from the SonicWALL
management interface.
Note: mySonicWALL.com registration information is not sold or shared with any other
company.
Creating a MySonicWALL Account from System > Licenses
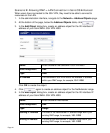
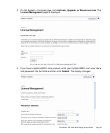
1. On the System > Licenses page, click Activate, Upgrade, or Renew services. The
License Management page is displayed.
2. If you do not have a MySonicWALL account or if you forgot your user name or
password, click the https://www.mysonicwall.com link at the bottom of the page.
The MySonicWALL User Login page is displayed.
Do one of the following:
• If you forgot your user name, click the Forgot Username? link.
• If you forgot your password, click the Forgot Password? link.
• If you do not have a MySonicWALL account, click the Not a registered user?
link.
3. Follow the instructions to activate your MySonicWALL account.
Registering with MySonicWALL
On a new SonicWALL SSL VPN appliance or after upgrading to SonicWALL SSL VPN
3.0 firmware from an earlier release, you can register your appliance from the
System > Licenses page.
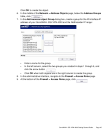
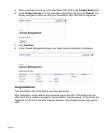
1. If you are not logged into the SonicWALL SSL VPN 4000 management interface, log
in with the username admin and the administrative password you set in the Setup
Wizard.
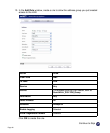
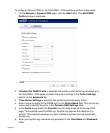
2. To navigate to the System > Licenses page, click System in the left-navigation
menu, and then click Licenses.


