AVR Robot Controller 1.1 Software Tools
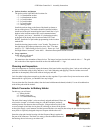
Double-click on “LaunchPN.bat” in the “C Samples” folder. This will launch Programmers Notepad with the path
changes needed by the compiler and downloader. (If you installed WinAVR in a non-default location, you’ll need to
edit this batch file.)
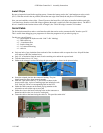
While power to the ARC board is off, plug the programming cable into the ISP header on the board and the parallel
(printer) port of a PC. (If you are using an AVRISP via a serial (or USB) port, you will need to open the “makefile”
file in the “01a FlashLED” folder and change two definitions: “AVRDUDE_PROGRAMMER = avrisp” and
“AVRDUDE_PORT = com1”. You may also want to define environment variables for these.)
In Programmers Notepad, use File/Open to open FlashLED.c in the “01a FlashLED” folder (in C Samples). In the
Tools menu, choose the “Make All” option. An “output” window will show the results of your build. (If you get a
message that “the system cannot find the file specified,” you probably just need to restart Programmers Notepad
using LaunchPN.bat.) To download the program, turn on power to the ARC board, then from the Tools menu,
choose the “Program” option.
You should now see the green LED flash with a one-second cycle time.
avr-gcc on Mac OS X
The easiest option for programming on the Mac is to use the C compiler and UISP downloader available via a
package installer from http://www.eecs.berkeley.edu/~mseeman/resources/macmicro.html
. It’s an easy install
process, but only compiles C, not C++, programs.
If you would like to use C++, you’ll need to do a full manual install (building all of the tools from source).
Fortunately, there are complete instructions in the AVR runtime library manual (avr-libc-user-manual-1.0.4.pdf)
available at http://savannah.nongnu.org/projects/avr-libc/. Follow the steps in section 7.8, “Installing the GNU Tool
Chain.” This document also lists the locations for downloading the other tools. One thing to be aware of is that you
need to have TeX installed to build AVRDUDE (it’s apparently used when building the included documentation); if
you have Fink installed, use the command: “fink install tetex”. You can avoid this by using the UISP downloader
instead of AVRDUDE.
Note: The AVR runtime library manual mentioned in the previous paragraph contains lots of useful information for
programming the Atmel ATmega processors, making it a good resource regardless of which compiler option you
choose.
Using these tools requires using the command line interface to the Mac’s Unix-based underpinnings. If you don’t
know how to use the Terminal program, you should read up on that before tackling the install and use of the AVR
tools.
Copy the “C Samples” folder from http://www.seattlerobotics.org/WorkshopRobot/Level1/
(or the Workshop CD’s
“Samples” folder) to a convenient place on your hard drive.
While power to the ARC board is off, plug the AVRISP device into the ISP header on the board and connect it to a
USB-to-serial converter attached to your Mac. Open the makefile in the “01a FlashLED” folder and change two
definitions: “AVRDUDE_PROGRAMMER = avrisp” and “AVRDUDE_PORT = ___”. For the port, you will need
to use the name of the serial port supplied by your USB-to-serial adapter. You can get a list of available serial
devices by typing in the Terminal window: “
ls /dev/cu.*”. You will need to supply the full name, e.g.
“AVRDUDE_PORT = /dev/cu.USA281b1P2.1”.
In the Terminal window, change to the “01a FlashLED” folder. At the command line type “make” to compile the
program. Turn on power to the ARC board, then type “make program” to download the program.
You should now see the green LED flash with a one-second cycle time.
Customizing the Microcontroller
The ATmega16 microcontroller provided in the kit can be customized by changing “fuse bits.” These settings may
be modified with built in programmer that comes with BASCOM, or with the AVRDUDE program included in the
WinAVR suite.
Every fuse bit has a default value. There are several fuse states that it’s useful to change. These are explained in
more detail in the “ATmega16 Overview” section. The suggested changes are: (1) set the internal oscillator (clock)
12 11-3-2005


