AVR Robot Controller 1.1 Assembly Instructions
Prepare Boards
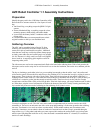
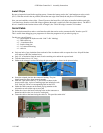
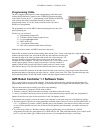
The PCB comes with a serial adapter and a programming adapter that need to be detached. First break the long line
of holes. You might find it easier to break if you run a razor knife along the top and bottom of the line of holes. Then
snap the two smaller boards apart. Finally, if you want, you can sand or file the rough edges smooth.
Controller
The control board has been designed with oversized holes to facilitate hand assembly and disassembly. The problem
is that components will fall out when the board is turned upside down. If you assemble from shortest to tallest
components, then it is possible to load several parts onto the board, cover it with a piece of conductive foam or
cardboard and turn it over. Still, parts will tilt and move about. The trick is to solder one pin of each part into place,
turn the board over and re-position the parts by re-heating the soldered pin while pushing on the other side with your
finger. When all the parts are positioned to your satisfaction, then turn the board back over and finish soldering the
rest of the pins.
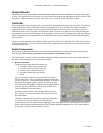
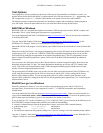
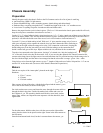
The picture on the right shows the completed ARC board for the SRS Level 1 Robot Kit. The “front” of the board is
at the top of the picture. This refers to how the board will be mounted on the robot, and is used to describe locations
in the instructions below.
Solder Components
Part locations are labeled on the board, but some labels are incomplete due to solder pad location, and some parts
have changed. Please read the instructions to ensure that parts are installed correctly.
The following list is in order of shortest to tallest component. All the components in each section can be soldered at
one time, or each component can be soldered in separately.
Resistors and diode
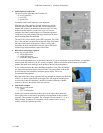
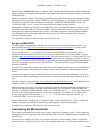
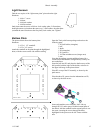
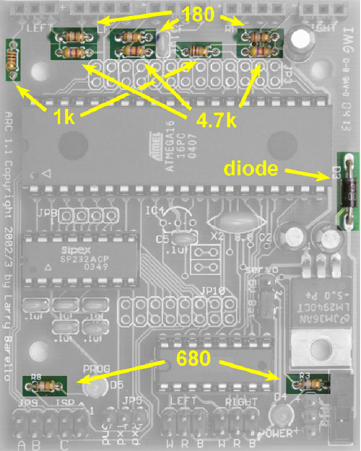
The picture on the right shows the locations for:
3 - 180 ohm resistors (brown-gray-brown)
3 - 4.7k ohm resistors (yellow-violet-red)
2 - 1k ohm resistors (brown-black-red)
2 - 680 ohm resistors (blue-gray-brown)
1 - diode
Important: Note the locations for the 180 and 4.7k resistors at
the top of the picture. They are installed in locations marked 680
and 33k, respectively. (R3 and R8 remain 680 ohms, as shown at
the bottom of the picture.) These resistors are selected to work
well with the Fairchild QRB1134 phototransistors (light sensors)
in the kit. For more information, read the section titled “Left,
Center, and Right Floor Sensor Inputs.”
Orientation of the resistors is not important. Resistors do not
have “polarity,” so it does not matter which end goes into each
hole on the board.
The diode is inserted with the band toward the end of the arrow
on the board. If you know what you are doing and want
maximum power you may omit the diode, replacing it with a short piece of wire. This will remove the reverse
battery protection that prevents destruction of the H-Bridge chip and/or attached servos. The voltage regulator
protects the rest of the board from battery reversal.
6 11-3-2005


