Preparing to print 49
❏ Click on the Next button.
❏ Select whether to print out a test page by clicking on the appropriate radio
button.
❏ Click on the Finish button.
❏ If a message appears requesting you to insert the Windows 95 CD-ROM,
insert it into the CD-ROM drive and click on the OK button.
❏ If a message appears saying that the printer driver file LC7211.DRV cannot
be found on the Windows 95 CD-ROM, click on the Browse button, select
the floppy disk drive’s name (“A:” or “B:”), click on “WIN95” in the list of
directories and click on the OK button (or double-click on “WIN95”).
❏ Click on the OK button.
This concludes the printer set-up.
Preparing to print
Often you can simply select the Print command in the application you are
using, click the OK button, and your document will be printed out. However,
sometimes you may need to change certain settings beforehand, such as the
default printer, which port a printer uses, which printer driver it uses, the paper
size, the paper source etc.
Settings are made by checking radio buttons, entering numbers into fields or by
clicking on the arrow by the side of a field and selecting an option from the list
that appears. All these settings, and how to make them, are fully explained in
the Microsoft Windows 95 User’s Guide.
Some settings, e.g. paper size and paper source, can be made within an
application when you select the Print command (see the next section:
Printing a document). However, settings made within an application only affect
printing from that application.
To change the default printer and to make general settings that will apply to any
application, proceed as follows:
❏ Click on the Start button in the bottom lefthand corner of the screen.
❏ Select Settings.
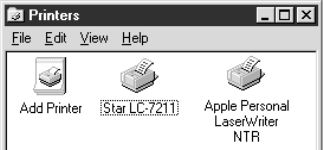
❏ Release the mouse button on Printers.


