


38 Sun Quad FastEthernet 6U CompactPCI Adapter Installation and User’s Guide • June 2000
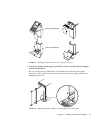
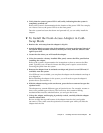
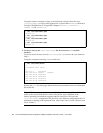
8. Push the adapter all the way into the slot until the two ejection levers move
inward.
The tabs of the ejection levers (see
FIGURE 3-4) should fit smoothly in the rectangular
cutouts in the top and bottom of the slot.
9. Close the ejection levers by pushing the levers in toward the adapter.
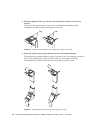
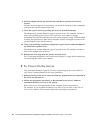
The adapter may contain different types of ejection levers. For example,
FIGURE 3-5
shows two possible types of levers. The levers may also contain a locking
mechanism that will lock when the levers have been properly closed. When installed
correctly, the ejection lever tabs will fit smoothly into the rectangular cutouts in the
top and bottom of the slot (
FIGURE 3-6).
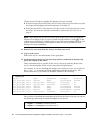
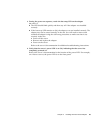
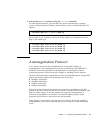
10. Using a No. 0 Phillips screwdriver, tighten the captive screws inside the adapter’s
top and bottom ejection levers.
The adapter may contain different types of ejection levers. For example,
FIGURE 3-8
shows two possible types of levers.
11. Remove the wrist strap from the chassis and your wrist.
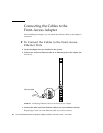
See “Connecting the Cables to the Front-Access Adapter” on page 40 for instructions
on connecting the cables to the adapter.
▼ To Power On the Server
This procedure describes a general overview of powering on the server. Refer to
your server’s documentation for the exact procedure.
1. Before powering on the server, make sure that any peripheral devices connected to
the server are powered on.
2. Follow the appropriate procedures, as documented in the server’s hardware
installation manual, to power on the system.
Refer to the server’s documentation for the complete power on procedure.
For example, if you installed the adapter in a Netra ct server, refer to the Netra ct
Server Service Manual. This manual contains the powering on procedures.