


2-4
X7DCL-3/X7DCL-i User's Manual
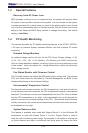
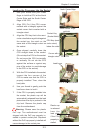
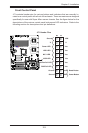
Installing the Heatsink
CEK Passive Heatsink
Screw#1 Screw#2
Screw#1
Do not apply any thermal grease to the 1.
heatsink or the CPU die; the required
amount has already been applied.
Place the heatsink on top of the CPU 2.
so that the four mounting holes are
aligned with those on the retention
mechanism.
Screw in two diagonal screws (ie the 3.
#1 and the #2 screws) until just snug (-
do not fully tighten the screws to avoid
possible damage to the CPU.)
Finish the installation by fully tighten-4.
ing all four screws.
Screw#2
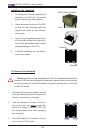
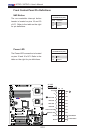
Warning: We do not recommend that the CPU or the heatsink be removed.
However, if you do need to uninstall the heatsink, please follow the instructions
on the next page to uninstall the heatsink to prevent damage done to the CPU
or the CPU socket.
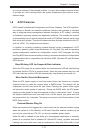
To Remove the Heatsink
!
Unscrew and remove the heatsink screws 1.
from the motherboard in the sequence as
shown in the picture on the right.
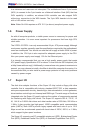
Hold the heatsink as shown in the pic-2.
ture on the right and gently wriggle the
heatsink to loosen it from the CPU. (Do
not use excessive force when wriggling
the heatsink!!)
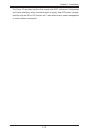
Once the heatsink is loosened, remove 3.
the it from the CPU socket.