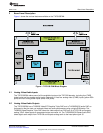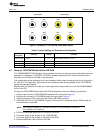
Board Level Description
www.ti.com
2.3 Digital Video/Audio Outputs to DaVinci HD EVM
The TVP5158EVM has two dedicated connectors which match the digital video/audio input connectors on
the DaVinci HD EVM. Connector J9 includes a 16-bit video data bus (buffered data from DVO_A and
DVO_B of TVP5158), OCLK_P, OCLK_N, I2C and interrupts. The connector J10 includes BCLK, LRCLK
and SD_R/SD_M outputs from TVP5158. Samtec HQCD cables are required to connect TVP5158EVM
digital video and audio signals to the DaVinci HD EVM.
2.4 Digital Video/Audio Cascade Output/Input
The TVP5158EVM has two connectors for video/audio cascade mode test. The connector J2 is for
video/audio cascade output, which includes buffered data from the DVO_A and DVO_B video output ports
and audio cascade output from TVP5158. The connector J3 is for video/audio cascade input, which
includes video input data to the DVO_C and DVO_D video ports and audio cascade input from a lower
cascaded stage TVP5158 device.
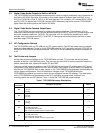
2.5 I2C Configuration Options
The TVP5158EVM uses one PC USB port for I2C communication. The I2C bus master can be changed
based on jumper settings. Control is via the PCB USB interface (VCC application controls TVP5158), via
the DaVinci EVM (DSP driver software controls TVP5158) or via the cascade input/output connectors J3
or J2.
2.6 Test Points and Jumpers
Various test points are available on the TVP5158EVM for the user. This includes the various power
supplies as well as a few GND test points. The user can also use J2/J3 for primary test-point headers to
access video/audio data, video/audio clocks, I2C and GND.
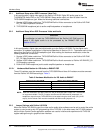
There are several jumpers available on the TVP5158EVM that configure I2C address select, I2C control
configuration, clock source selection and I2S source select. Each jumper is set by default in its preferred
state for the TVP5158EVM. Next to each jumper on the TVP5158EVM is the silkscreen that describes the
various jumper configurations. If the I2C address is changed on the TVP5158EVM while the
TVP5158EVM is powered up, then that device will not recognize the new I2C address. The reset button
on the TVP5158EVM must be pressed and the VCC application must be exited, restarted, and
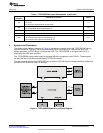
re-configured for the new I2C address. Table 1 shows the TVP5158EVM jumper settings.
Table 1. TVP5158EVM Jumper Descriptions
Jumper
Description of Function Default
Designator
TVP5158 I2C address selection (I2C_A0)
W0 1-2
1-2: Low
2-3: High
TVP5158 I2C address selection (I2C_A1)
W1 1-2
1-2: Low
2-3: High
TVP5158 I2C address selection (I2C_A2)
W2 1-2
1-2: Low
2-3: High
I2C SDA source selection
1-2: USB controls I2C
W3 1-2
2-3: DaVinciHD controls I2C
OFF: Control by another EVM for cascade mode.
I2C SCL source selection
1-2: USB controls I2C
W4 1-2
2-3: DaVinciHD controls I2C
OFF: Control by another EVM for cascade mode.
8
TVP5158 Evaluation Module SLEU108–November 2009
Submit Documentation Feedback
Copyright © 2009, Texas Instruments Incorporated


