


3. Press the Apply button for each user and they will be added to the user
list.
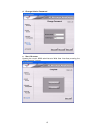
4. From the Accounts menu, choose Groups item and the Local Group
Configuration screen appears. Click Add to add a new group.
5. Enter a group name in the Group Name box and click Apply to add the
group to the group list.
For more on managing users, go to Chapter 3: System Management > User
and Group Management.
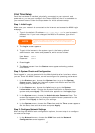
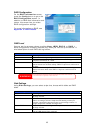
Step 6: Create Folders and Set Up ACLs
Once users are introduced into your network, you can begin to create various
folders on the N299 and control user access to each using Folder Access Control
Lists.
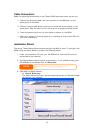
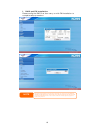
1. From the Storage menu, choose the Folder item and the Folder screen
appears. Press the Add button and the Add Folder screen appears.
2. Enter the name and description of the folder and choose whether it is
browseable. Press Apply to create the folder.
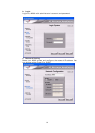
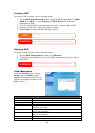
3. On the Folder screen press ACL (Access Control List) to configure which
users have access to this folder.
4. On this screen, configure access to this folder for users and groups. Select
a user or a group from the left hand column and then choose Deny
Access, Read Only, or Writable to configure their access level. Press
Apply to confirm settings.
NOTE
You must set the ACL for each folder for access by specific
otherwise the folder is inaccessible to all users and groups.
users and groups;
For more information on managing folders, see Chapter 3: System
Management > Storage Management > Folder Management.
To find out about configuring Folder Access Control Lists, see Chapter 3: System
Management > Storage Management > Folder Management > Folder
Access Control List (ACL).
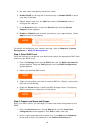
Step 7: Start Services
Finally, you can start to setup the different services of the N299 for the users on
your network. You can find out more about each of these services by clicking
below:
Windows Networking Media Server
Apple File Protocol (AFP) Download Manager
FTP Server Printer Server
iTunes® Server IP Cam Surveillance Server
Photo Gallery
19