


18
2
Chapter 2
COPY FUNCTIONS
This chapter explains basic copying functions such as normal copying, reduction or enlargement, and exposure
adjustment.
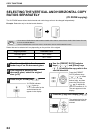
NORMAL COPYING
This section explains how to make a regular copy.
If "Auditing mode" has been enabled (p.39), enter your 3-digit account number.
Copying from the document glass
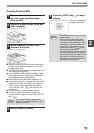
1
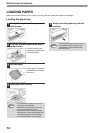
Open the document cover/ADF, and
place the original.
Place the original face
down on the document
glass. Align it with the
original size scale.
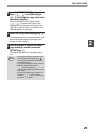
2
Close the document cover/ADF.
3
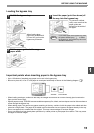
Press the [ORIGINAL SIZE ENTER]
key ( ) and select the original size.
When the original size is
selected, the tray with the
same size of paper is
automatically selected.
(Two-tray model only)
● Make sure that the PAPER SIZE indicator lights up.
If the indicator is not lit, no tray has the same size of
paper as the original. Load paper of the required
size in a tray, or select the bypass tray with the
[TRAY SELECT] key ( ) and copy from the
bypass tray.
● The bypass tray must be manually selected.
● To copy on paper of a different size than the
original, select the paper with the [TRAY SELECT]
key ( ).
● If the ORIGINAL SIZE indicator is blinking, rotate
the original so that it is in the same orientation as
the blinking ORIGINAL SIZE indicator.
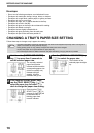
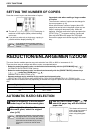
4
Set the number of copies.
5
Press the [START] key ( ) to begin
copying.
The copy is delivered to
the paper output tray.
DO NOT place heavy objects on the
original glass and do not press on it with
force. Breaking the glass could cause
personal injury.
An original up to A3 (LD) can be placed
on the document glass.
Note
• The paper output tray can hold up to 250
sheets of paper.
• About one minute after copying ends,
"Auto clear" activates and restores the
copy settings to the initial settings. (p.12)
The setting for "Auto clear" time can be
changed in the user programs. (p.33)
• Press the [CLEAR] key ( ) to stop
copying in the middle of a run.
Note