USER SETTINGS
35
4
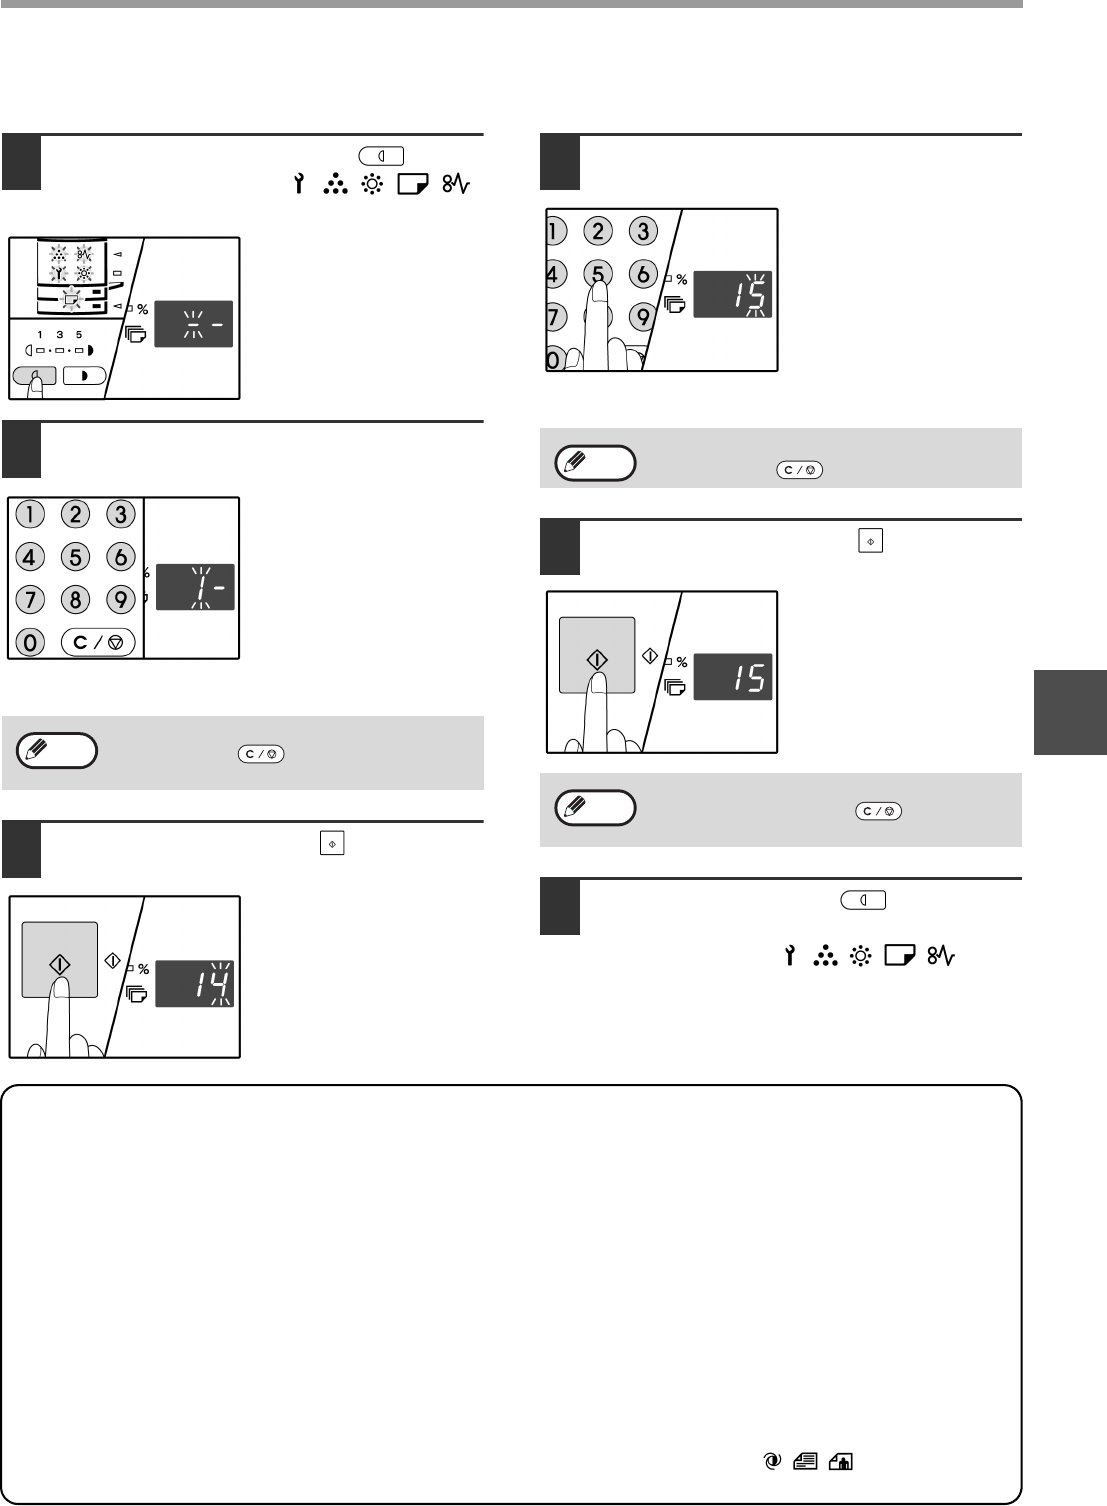
SELECTING A SETTING FOR A USER PROGRAM
1
Hold down the [Light] key ( ) until
the alarm indicators ( , , , , )
blink.
The display shows "- -"
with the left hyphen
blinking.
2
Enter the program number with the
numeric keys.
• See “USER
PROGRAMS” (p.33 to
p.34) for the program
numbers.
• The selected program
number blinks.
• For example, to select
"Auto clear timer",
press the [1] key.
3
Press the [START] key ( ).
• The selected program
number stops blinking
and lights steadily.
• The currently selected
setting code blinks on
the right side of the
display.
4
Enter the desired setting code by
pressing a numeric key.
• For the setting codes,
see “USER
PROGRAMS” (p.33 to
p.34)
• The selected setting
code blinks.
• For example, to select
90 seconds, press the
[5] key.
5
Press the [START] key ( ).
The selected setting code
stops blinking and lights
steadily.
6
Press the [Light] key ( ) to
complete the settings.
The alarm indicators ( , , , , ) go off
and the display returns to the number of copies
display.
Audible signals (key entry beep, invalid key beep, base setting beep)
The machine sounds three different types of beep signals: a key entry beep that sounds when a valid key is
pressed, an invalid key beep that sounds when an invalid key is pressed, and a base setting beep that sounds
when a setting is the same as the base setting (base settings are explained below). The base setting beep is
initially disabled. If you wish to enable the base setting beep, see "Base setting beep signal" on page 34. If you
wish to change the volume of the beep signals or disable them, see "Audible signals volume" on page 34.
The beep patterns of each type of beep signal are as follows:
Key entry beep ......................... One beep
Invalid key beep ......................Two beeps
Base setting beep ................Three beeps
Base settings
The base settings are preset standard selections for each copy setting. The base settings are as follows:
Copy ratio ........................................100%
Light and Dark indicator........................ 3
Paper feed location....... Upper paper tray
ORIGINAL SIZE............................. A4 (LT)
AUTO/TEXT/PHOTO ( / / )
......................................................... AUTO
If you enter the wrong number, press the
[CLEAR] key ( ) and then enter the
correct number.
Note
If you enter the wrong number, press the
[CLEAR] key ( ) and return to step 2.
To select a setting for another user program,
press the [CLEAR] key ( ) and then
return to step 2.
Note
Note


