101
Learning the Basics
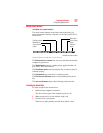
Using the optical drive
Due to manufacturing and quality variations in third party optical
media (e.g., CD or DVD or HD DVD) or optical media
players/recorders, in certain cases, your Toshiba optical drive may
not record on certain optical media that bear the applicable logo, or
play back optical media recorded by other computers or optical
media recorders. Additionally, certain optical media recorded on
your optical drive may not play back or operate properly on other
computers or optical media players. These problems are not due to
any defect in your Toshiba computer or optical drive. Please refer to
your computer's product specification for listing of specific format
compatibilities.
Copy protection technology may also prevent or limit recording or
viewing of certain optical media.
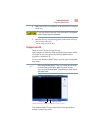
For details on how to use the software, please refer to the respective
Online Help menus.
Removing a disc with the computer on
To remove a disc (CD or DVD) with the computer turned on:
1 Press the eject button on the drive.
Do not press the eject button while the in-use indicator light is
glowing. Doing so could damage the disc or the drive.
Also, if the disc is still spinning when you open the disc tray, wait for
it to stop spinning before you remove it.
2 Pull the tray out until it is fully open, remove the disc, and
place it in its protective cover.
3 Gently press the tray in to close it.
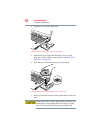
Removing a disc with the computer off
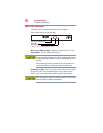
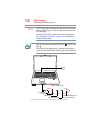
To remove a disc with the computer turned off:
1 Insert a slender object, such as a straightened paper clip, into
the manual eject hole.
The disc tray slides partially out of the drive (about 1 inch).
Never use a pencil to press the manual eject button. Pencil lead can
break off inside the computer and damage it.
NOTE


