


43
1 2
5
5
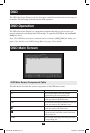
Features continued
Front Panel continued
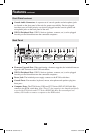
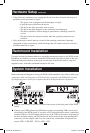
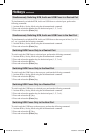
3
Console Audio Connectors: Aseparatesetofconsolespeakerandmicrophonejacks
are located on the front panel of the unit for greater accessibility. Devices plugged
into these ports will take priority over devices plugged into the console speaker and
microphonejacksonthebackpaneloftheunit.
4
USB 2.0 Peripheral Port: USB2.0devices(printers,scanners,etc.)canbeplugged
into this port and shared between the connected computers.
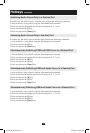
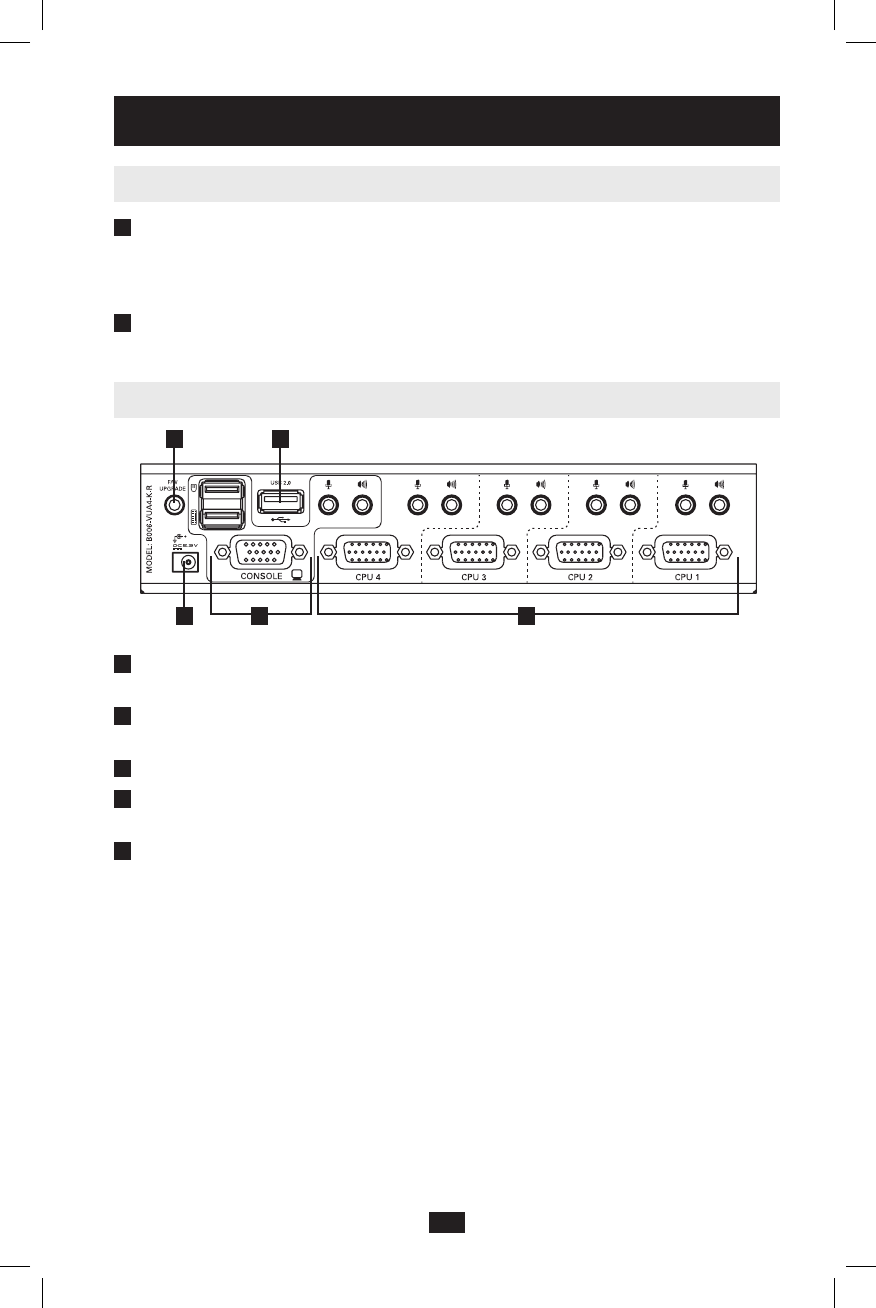
Back Panel
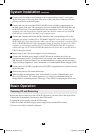
1
Firmware Upgrade Port: Whenperformingarmwareupgrade,theincludedrmware
upgradecableconnectstotheKVMswitchhere.
2
USB 2.0 Peripheral Port: USB2.0devices(printers,scanners,etc.)canbeplugged
into this port and shared between the connected computers.
3
Power Jack: TheincludedpowersupplyconnectstotheKVMswitchhere.
4
Console Ports: Your monitor, keyboard, mouse, microphone and speakers plug into
these ports.
5
Computer Ports: TheP756-Series(USB)andP757-Series(PS/2)KVMCableKits
connecttotheKVMswitchhere.Note: These 17-pin connectors are shaped specifically
to work with P756-Series and P757-Series KVM Cable Kits. Do not attempt to use
ordinary VGA cable to connect a computer to the KVM switch.
201004198 93-2947.indd 5 4/23/2010 3:26:52 PM