


20
4. Configuration
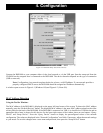
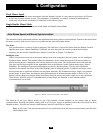
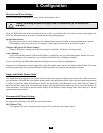
Using the Linux Tool:
The MAC address of the B050-000 is displayed on the upper left corner of the screen. To detect the MAC address manually,
press the “Refresh” button. The displayed MAC address is the same MAC address printed on the white sticker placed on
the back of the B050-000. The Linux setup tool currently does not support device configuration via the USB interface.
Please use either a network connection or the serial console for the initial device configuration. Furthermore, there are two
buttons on the window: “Query Device” and “Setup Device”. Press the “Query Device” button to display the reconfigured
values of the network configuration. The values are displayed in the text fields located nearby. If necessary, adjust the
network settings to your needs. To save the changes enter a user name and password, then press the “Setup Device” button.
Authentication
To adjust the authentication settings, enter your login as a Super User and change your password.
Super User Login:
• Enter the login name of the Super User. The initial value is “super”.
Super User Password:
• Enter the current password for the super user. The initial value is “pass”.
New Super User Password:
• Enter the new password for the Super User.
New Password (Confirm):
• Re-type the new password for the Super User. Press the “OK” button to close the window and accept the
changes. Otherwise press the “Cancel” button (on Windows). On a Linux system close the window using the
appropriate button on the window frame.
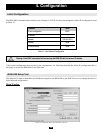
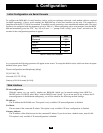
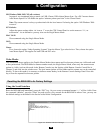
By default, the B050-000 will try to contact a DHCP server in the subnet to which it is physically connected. If a DHCP
server is found, it may provide a valid IP address, gateway address and net mask. Before you connect the device to your
local subnet, be sure to complete the corresponding configuration of your DHCP server. It is recommended to configure a
fixed IP assignment to the MAC address of the B050-000. You can find the MAC address on the outside of the shipping
box and labeled on the bottom side. If this initial configuration does not meet your local requirements, use the setup tool
to adjust the values to your needs. The setup tool can be found on the CD ROM delivered with this package. You can follow
the procedure described below.
Initial Configuration via DHCP Server