


9.2 <
Maintenance>
Cleaning your machine
To maintain print and scan quality, follow the cleaning procedures below
each time the toner cartridge is replaced or if print and scan quality
problems occur.
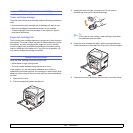
Cleaning the outside
Clean the covers of the machine with a soft lint-free cloth. You can
dampen the cloth slightly with water, but be careful not to let any water
drip onto or into the machine.
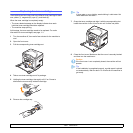
Cleaning the inside
During the printing process, paper, toner, and dust particles can
accumulate inside the machine. This buildup can cause print quality
problems, such as toner specks or smearing. Cleaning the inside of the
machine clears or reduces these problems.
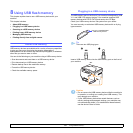
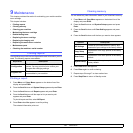
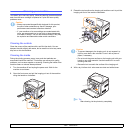
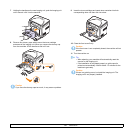
1 Turn the machine off and unplug the power cord. Wait for the
machine to cool down.
2 Open the front cover and pull the imaging unit out of the machine
using the handle on its bottom.
Caution
• Always use materials specifically designed for this product,
the use of other materials may result in damage, poor
performance and create a hazardous situation.
• If your machine or its surroundings are contaminated with
toner, we recommend you to use cloth or tissue dampened
with water to clean it. Do not use aerosol cleaners, they may
be explosive and flammable under certain conditions.
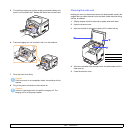
3 Extend the top handle on the imaging unit and then use it to pull the
imaging unit out of the machine completely.
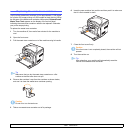
4 With a dry lint-free cloth, wipe away any dust and spilled toner.
Caution
• To prevent damage to the imaging unit, do not expose it to
light for more than a few minutes. Cover it with a piece of
paper, if necessary.
• Do not touch the green surface on the imaging unit with your
hands or any other material. Use the handle on it to avoid
touching this area.
• Be careful not to scratch the surface of the imaging unit.
Tip
After cleaning, let the printer dry completely.