


Using Your Printer with a Macintosh
30
Install the Scan driver
1
Make sure that you connect your printer to the computer.
Turn on your computer and printer.
2
Insert the CD-ROM which came with your printer into the
CD-ROM drive.
3
Double-click
CD-ROM icon
that appears on your
Macintosh desktop.
4
Double-click the
MAC_Installer
folder.
5
Double-click the
MAC_Twain
folder.
6
Double-click the
Xerox Scan Installer
icon.
7
Enter the password and click
OK
.
8
Click
Continue
.
9
Click
Install
.
10
Click
Continue
.
11
After the installation is finished, click
Quit
.
Uninstalling the Scan driver
1
Insert the CD-ROM which came with your printer into the
CD-ROM drive.
2
Double-click
CD-ROM icon
that appears on your
Macintosh desktop.
3
Double-click the
MAC_Installer
folder.
4
Double-click the
MAC_Twain
folder.
5
Double-click the
Xerox Scan Installer
icon.
6
Enter the password and click
OK
.
7
Click
Continue
.
8
Select
Uninstall
from the Installation Type and then Click
Uninstall
.
9
Click
Continue
.
10
When the uninstallation is done, click
Quit
.
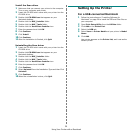
Setting Up the Printer
For a USB-connected Macintosh
1
Follow the instructions on “Installing Software for
Macintosh” on page 29 to install the PPD and Filter files on
your computer.
2
Open
Print Setup Utility
from the
Utilities
folder.
3
Click
Add
on the
Printer List
.
4
Select the
USB
tab.
5
Select
Xerox
in
Printer Model
and your printer in
Model
Name
.
6
Click
Add
.
Your printer appears on the
Printer List
, and is set as the
default printer.