


116 Chapter 7– Color Workflow
Quick Calibration
You can perform a quick calibration at any time. The only required action
is to scan the reflection reference as you would with any other strip. You
should only perform a quick calibration after a full calibration has been
done. New densitometers are fully calibrated before leaving the factory.
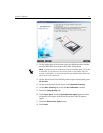
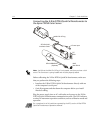
1. Position the X-Rite DTP34 QuickCal densitometer on the reference
as previously mentioned.
2. Press and click the button and scan the reference to the opposite end.
Release the button. The LED should indicate green if the calibration
was successful. If calibration fails (fast flashing amber LED), verify
that the strip is clean and re-read.
3. Place the reflection reference in its protective envelope, and store the
envelope away from light and heat.
Full Calibration
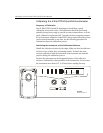
1. To manually invoke the calibration mode, press and hold the
Instrument button for a minimum of three seconds. The LED slowly
flashes amber when calibration is initiated.
2. Press and hold the button (if not previously held) and scan the
reference to the opposite end. Release the button. The LED should
indicate green if the calibration was successful. If calibration fails, (fast
flashing amber LED), verify the strip is clean and re-read.
3. Place the reflection reference in its protective envelope, and store the
envelope away from light and heat.
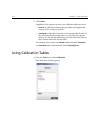
Creating a Calibration Table
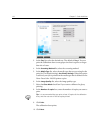
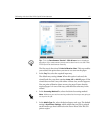
1. In the Spire CX250 color server application, from the Tools menu,
select
Calibration.
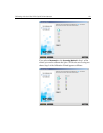
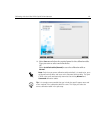
2. In the Calibration window, click Calibrate.
The Calibration Wizard window appears.
Note: If the host computer initiated calibration (amber LED), skip to step 2.