


Windows Drivers
Xerox® Phaser® 3052/3260
User Guide
33
Windows Drivers
Installing Windows Drivers
The following provides an overview of the print procedure and features available when printing using
Windows.
Local Printer
A local printer is a printer directly attached to your computer using a printer cable, such as a USB cable.
If your printer is attached to a network, refer to refer to Networked Printer.
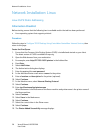
Note: If the New Hardware Wizard window appears during the installation procedure, select
Close or Cancel.
1. Make sure that the printer is connected to your computer and powered on.
2. Insert the supplied CD-ROM into your CD-ROM drive. The CD-ROM should automatically run, and
an installation window appears.
If the installation window does not appear, select Start and then Run. Type X:\Setup.exe,
replacing X with the letter which represents your drive and select OK.
If you use Windows Vista, select Start > All programs > Accessories > Run, and type X:\Setup.exe.
If the AutoPlay window appears in Windows Vista, select Run Setup.exe in the Install or run
program field, and select Continue in the User Account Control window.
3. Select Install Software. A Printer Connection Type window displays.
4. Select USB connection. The Select Software to Install window displays.
5. Leave the default selections and select Next. The Installing Software window displays.
6. After the installation is finished, the Setup Completed window displays.
7. Select Print a test page and select Finish.
If your printer is connected to the computer, a Test Print page prints. If the Test Print operation is
successful, refer to the Print chapter of this guide. If the print operation failed, refer to the
Troubleshooting chapter of this guide.