Connecting the Projector
10 Xerox DP1015 User’s Guide
Connecting Components
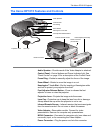
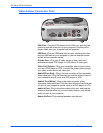
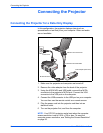
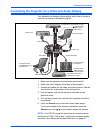
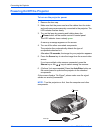
You can connect your projector to several types of video and audio
devices. Refer to the figure on the previous page as a guide for the
different connections described below.
Connect to a Computer
Typical Setup: You have a video file on your computer and want to
project it through your projector.
1. Plug the VGA cable into the VGA port on the computer, and
then into the VGA port on the projector.
2. If you want to use the remote control as a mouse, plug the USB
cable into the USB port on the computer, and then into the USB
port on the projector.
3. If your video file includes audio, plug the Audio In/Out cable
into the Audio Out port on your computer, and then into the
Audio In port on the projector.
The audio will play through the built-in audio speaker on the
projector’s Video Adapter.
4. If you want to play the audio through external speakers, plug
another Audio In/Out cable into the Audio Out port on the
projector, and then into the Audio In port on the speakers.
Connect to an S-Video DVD Player or VCR
Typical Setup: You have a DVD or Videotape that you want to
project through your projector.
1. Plug the S-Video cable into the S-Video port on the DVD Player
or VCR, and then into the S-Video port on the projector.
2. If the DVD or Videotape includes audio, plug the red and white
connectors on the Composite Video Cable into the
corresponding red and white ports on the projector. Then plug
the red and white connectors on the other end of the cable into
the corresponding ports on the DVD Player or VCR.
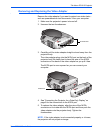
NOTE: Some Notebook computers deactivate their screens
when a second display device is attached, or will not display an
image through the projector until the screen settings are adjusted
for the second display device. Please see the user’s manual that
you received with your Notebook for the steps to reactivate its
screen and display the projected image.


